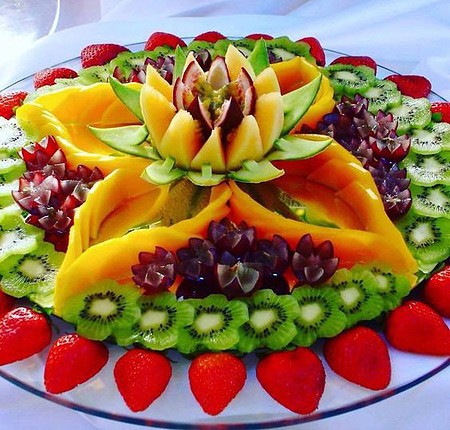
Would you like to take part in a cooking competition? At the prom, they will determine the king and queen of the ball, but for this you need not only to look beautiful, but also to cook some kind of dish?
Master carving lessons and create masterpieces from vegetables and fruits at home. Carving is a true art of artistic carving different materials. The history of edible carving began in Thailand about 700 years ago, when preparations were made for the Floating Lantern Festival.
Today fruit and vegetable carving taught in many educational institutions and is popular in Europe and CIS countries. We offer you several carving lessons, with which you can decorate the festive table in an original way at home.

Cut off the top of the head Chinese cabbage. Also remove the loose part of the leaves. After that, with a carbovka groove knife, make cuts of different lengths from the edge to the middle of the cabbage.

Approaching the middle of the head, shorten the length of the cuts to make a chrysanthemum.

Put the finished flower in ice water, then the thin cuts will twist beautifully, and the product will take on an elegant shape.

Vegetable carving, photo

cucumber leaves
Cut a piece of cucumber 5-7cm long. Using an oval grooving knife, start making cuts along the length of the cucumber, but not all the way through.

Make all cuts in a circle. The next row should be staggered in relation to the previous one. The number of rows depends on the thickness of the cucumber. Peel the core of the cucumber so that you can put the carrot blank in it. Dip the cucumber itself in ice water so that the petals open beautifully. The tips of the cucumber petals can be made triangular.

Ready lily can be put on a skewer. From a cucumber you can get a whole bunch of flowers that will complement any dish in an original way.

Cucumber should be cut into thin slices. After that, twist one slice into a tube, and then attach others to it so that you get flower petals.

Additionally, you can make leaves from cucumber. This decoration is perfect for salads.

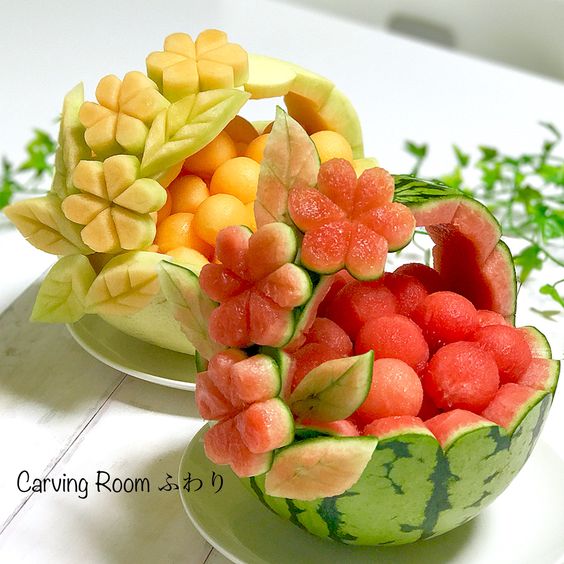
A watermelon or melon can make an original fruit or dessert basket. Measure the watermelon with a ruler and mark ½ of the height. Scratch around the strip to determine the height of the base of the basket.

Watermelon basket in technique, photo
Cut out a pen template from paper. On both sides of the watermelon, cut off the sides and proceed to cut out the handle. Cut out the side of the watermelon and scoop out the pulp with a spoon.
Peel off the top half of the watermelon. The red part of the watermelon should not be visible. For carving, use a sharp knife with a narrow blade.

Make an incision in the center in the form of a circle and start cutting out the first petal. After that, cut the rest of the petals in a circle.

The edges of the petals can be notched to give them a more realistic appearance.

Proceed to the second row of petals, which are more open. Cut out the third row of petals if the size of the watermelon allows. Next, make round blanks to cut out individual small flowers.

Leaf-shaped blanks will help to arrange leaves or unopened buds. On the lower crust watermelon, make decorative cutouts.
Having mastered the technique of carving from vegetables and fruits, you can make many decorative table decorations, as well as exclusive gifts for loved ones. Today, the popularity of carving is so great that they even hold championships in this art form.
Chrysanthemum from Chinese cabbage
|
1. Remove loose leaves from a head of Beijing cabbage weighing from 300 to 700 g and cut off the upper part of the head, leaving about 12-15 cm. |
2. We work with an oval or triangular carbide groove knife. |
|
 3. Let's make cuts of different lengths along the thick veins of the leaves, directing the knife from the top cut of the leaf to the base of the cabbage. We make the beginning of the cut thinner. As we approach the stump, we deepen the knife into the cabbage. |
4. Without cutting 1.5-2 cm to the stalk, remove the cut out large leaves. If the sheet is held tight, make a few notches with a small knife. |
|
 5. We cut the subsequent rows of leaves in the same way, shortening the length of the chrysanthemum petals to the middle. If the edges of the petals are thin enough, then in cold water they curl up into rings or curve beautifully. |
 |
|
|
6. Put the "chrysanthemum" in ice water for half an hour. The product will take on an elegant shape. Let's cut out a couple of green "leaves" from a cucumber and make a composition on a dish with salad or various cuts. |
||


|
Ready dahlias |
 1. Let's make a slightly flattened rounded blank with a diameter of 5-6 cm from a homogeneous product. |
|
 2. Cut out 7-9 petals with a medium oval knife, deepening the knife towards the core. |
 3. We cut off the excess pulp under the petals of the first row, forming a platform for the next row. |
|
 4. Cut out the petals of the next row with knives of different sizes, similarly to the first row. We place them between the petals of the previous row. Making it possible large quantity rows. |
 5. We cut to the end and make out the middle. |

 |
 |
 |
 |
 |
 |
Faces can be made better: 
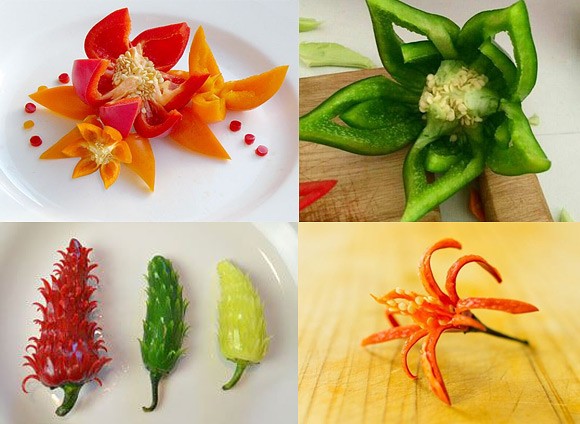
 Tomato flower
 |
 |
 |
Make 8 deep cuts on the tomato, as shown in the photo. Carefully separate the skin so that a little pulp remains on it.
Cut cucumber slices of a suitable size into halves and insert into the cuts.
Decorate the top of the "flower" with an olive or herbs. Santa Claus from vegetables  Needed: red Bell pepper(bigger) Chinese cabbage(head lettuce), a piece of cucumber, toothpicks for fastening.
 |
1. Remove the leg from the pepper and give it a stable position with the hole down. 2. Fasten a piece of cucumber on top with a toothpick. 3. Choose small lettuce leaves, preferably internal ones. Try on their size on the figure of Santa Claus: one sheet is longer - for the beard, three sheets are shorter - for the hair. Cut off the excess parts of the cutting. Pick up a cup-shaped sheet for the top layer of hair. 4. During the fitting, mark with a toothpick those places on a large sheet where the eyes, nose and mouth should be. 5. Make details of the face from pieces of olives and peppers by inserting them into small slots. Strengthen your mustache. 6. Attach with toothpicks (you can use their halves), first a long sheet with a face and a beard, then three short ones around the entire head. Put a top sheet on top. 7. Make a cap from the top of a pepper or a small tomato. Take a large leaf of head lettuce (outer) and cut a long strip 1.5-2 cm wide from the top of the petiole with a knife. Try to cut along the direction of the fibers. This will be the edge of the hat. Fasten the hat on the head and wrap it with a cut-out strip. |
 |
Capricorn (22.12 - 20.01) Required: 1 red and 1 green apple Take a whole red apple. Cut off a slice and two slices from it. Lay the slices on top of each other. This is the "torso." Cut the remaining slice into two halves. Cut out two triangles from them - "horns". Attach the cut off sector to the horns. Cut off two pieces from it. These are the "ears". The remaining part is the "head". Lay "ears". Lay the "head", "horns" and "ears" on the body. Cut circles from the peel of a green apple - "eyes". "Pupils" of green bones. Cut another slice from the remaining apple. Cut out four stripes from it - "legs". Add "legs". Cut a beard from a piece of green apple peel. |
|
 |
Aquarius (21.01 - 20.02) You will need: 1 pitted green olive, 1 corn kernel, 1 salami slice Take one pitted olive. Cut it lengthwise into two halves. Cut off a sector from one half. Expand and attach this sector to the slice. This is a "jug". Cut off a small sector from the second half. Attach it to the bottom of the "jug". Cut a small slice from the remaining olive. Cut it into two halves. These are the "handles" of the "jug". Attach the "handles" to the "jug". Place half a grain of corn at the "neck" of the "jug" in the form of pouring water. |
|
 |
Pisces (21.02 - 20.03) You will need: 1 green olive, 4 corn kernels, 1 black olive, 1 slice of salami. Take one pitted green olive. Cut it lengthwise into two halves. One of them cut across into 2 parts. One part is the "head". From the second part, cut the "tail". Lay out the "scales" from the corn kernels. Attach a "head" to it. Make an "eye" from a piece of black olive. Cut the other half of the olive in half lengthwise. One of them cut across into two halves. These are "fins". Attach "fins". Add another grain of corn. Attach "tail". |
|
 |
Aries (03/21 - 04/20) You will need: 1 pitted green olive, 1 black olive, 1 corn kernel, 1 salami slice. Cut the olive into two halves. Cut two thin slices from the second half. Make cutouts out of them. These are "horns". Insert the "horns" into the half of the olive. This is the "head". Place the remaining piece of olive cut side down. Cut it in half. Attach this piece to the "head". Cut the corn kernel lengthwise. Unfold the grain halves. These are the "eyes". Lay the "eyes" on the "head". "Pupils" are made from pieces of black olives. Lay on a slice of salami or canapé sandwich. |
|
 |
Taurus (21.04 - 21.05) You will need: 2 pitted green olives, 1 black olive, 1 corn kernel, 1 salami slice. Take two pitted green olives. Cut one of them lengthwise into two halves. One half is the "head". Cut the second olive in half crosswise. Cut off a slice from the second. Make a cutout on it. These are "horns". Place the other half cut side down. Cut out two pieces from it. These are the "ears". Lay out the "muzzle" from the remaining pieces. Cut the corn kernel lengthwise. Unfold the grain halves. These are the "eyes". "Pupils" are made from pieces of black olives. Lay the "eyes" on the "head". |
|
 |
Gemini (22.05-21.06) You will need: 1 pitted green olive, 1 black olive, 2 corn kernels, a piece of red sweet pepper, 1 slice of salami. Cut the olive into two halves. Cut out “handles” and “legs” from half an olive. From the second half of the olive, cut the same "torso". "Head" to make from a grain of corn. "Mouth" - from a piece of red sweet pepper. "Eyes" - from tiny pieces of black olive. Attach the "head" to the "torso". Make another "twin". Lay them on a slice of salami or on a sandwich - canape. |
|
 |
Cancer (22.06 - 22.07) You will need: 1 pitted green olive, 1 black olive, 1 salami slice. Cut a pitted green olive into two halves. Cut off two sectors from one of them. Make incisions in these sectors. These are "claws". Cut the remaining middle part into two halves. One half is the "torso". Cut the other half into pieces. This is the "neck". Lay on the "torso" "eyes" - tiny pieces of black olives. Attach "claws". |
|
 |
Leo (23.07 - 23.08) You will need: 1 pitted green olive, 1 black olive, 1 corn kernel, 1 pea, 1 salami slice. Cut a small slice from a green olive. Cut a sector out of it. Cut a thin slice from the remaining olive. Lay the first slice on it. This is a "muzzle". Attach the cut sector. This is the mouth. Cut two more thin slices from the remaining olive. Cut one of them into two pieces. Cut out of them "mane". From another slice, cut out two more details of the "mane". Attach "mane". Cut the corn kernel lengthwise. Unfold the grain halves. These are the "eyes". "Pupils" - from pieces of black olive. Lay the "eyes" on the "head". Make a nose out of canned green peas. |
|
 |
Virgo (24.08 - 23.09) Take a whole red apple, cut off a slice from it. Cut it into two halves and cut off 2 small sectors from each. These are "hands". The remaining parts are the "body". On the other side of the apple, cut another slice. Cut a circle out of it. This is the "head". From a thin slice of apple, cut out the "nose" and "mouth". Cut out "eyes" from pieces of green apple peel. "Pupils" cut from the peel of a red apple. Cut a thin slice from the remaining apple. Cut a circle out of it. Using the same notch, cut this circle into thin slices. It's "hair". Attach two parts of the "torso" to the head. Attach "hands" to the "torso". |
|
 |
Libra (24.09 - 23.10) You will need: 1 pitted green olive, 1 corn kernel, 1 pea, 1 salami slice Take a whole green olive without a stone. Cut it crosswise into two halves. Cut one of the halves into two more pieces. Lay them cut side up. These are the "bowls" of the scales. Cut a thin slice from the other half of the olive. Cut it into two pieces. Attach these parts to the "bowls". Lay a pea between them. Decorate with a grain of corn. Lay on a slice of salami or on a canapé sandwich. |
|
 |
Scorpio (24.10 - 22.11) You will need: 1 pitted green olive, 1 black olive, 1 corn kernel, 1 salami slice Take a whole green olive without a stone. Cut off a slice from it. Cut it into slices. This is the "body". Put the rest of the olive cut side down and also cut into slices. Three medium slices will be needed to make the "tail" and "claws". Cut one slice into pieces. Lay out of these pieces "tail". From the remaining two slices lay out two "claws". Attach them to the scorpion. Make a "head" out of a grain of corn. "Eyes" cut out of black olives. |
|
 |
Sagittarius (23.11 - 21.12) Required: 1 whole green apple Take a whole green apple. Cut off a slice from it. Cut off a small section from this slice, then cut off another section of the same size. Cut a thin slice from the rest of the apple. Cut out the middle from this part. This is "bow". Cut a thin slice from the apple. Cut an arrow out of it. Lay the "bow" and "arrow" on the apple slice. "Bow" to make from the cut off sections. |
See how beautifully you can decorate a sweet table with oranges or any other citrus fruits.
How to decorate a lime orange or other citrus this way? Let's take a look at the master class.
1. Buy oranges, grapefruits, limes with beautiful hard skins.
2. Take paper tape and wrap the fruit. So you can draw even parallel lines for the pattern. 

3. Use a felt-tip pen to apply a pattern.
4. Using carving knives, make cuts in the peel so that only the topmost colored part of the peel is removed. In this case, the white layer will look contrastingly against the rest of the background.
5. Now you need to treat the surface with a slice or lemon juice. This is necessary so that the incisions do not turn black.
6. Dip the fruit with patterns in a bowl of cold water for a short time.
7. Now leave for a few days in a well ventilated area.
That's all. So processed citrus fruits can retain their beauty for quite a long time.
Carving for beginners on KluKlu
Word "Carving" entered our speech thanks to the English word " carving", which literally translates as "cutting". Further in the culinary art, Carving began to be called artistic cutting on vegetables and fruits. We will not delve into the history of the emergence of Carving, we will better deal with its very basics, see many master classes, learn the secrets of professionals and be inspired by the masterpieces of the Masters. If you knew just a little bit about Carving from vegetables and fruits, then after reading this detailed article "Cross" you will know almost everything about it!
Fruits and vegetables for carving
Vegetables and fruits that are most suitable for curly cutting:
- carrot;
- potato;
- cucumber;
- radish;
- radish;
- ginger;
- melon;
- watermelon;
- pumpkin;
- vegetable marrow;
- Apple;
- quince;
- pear;
- kiwi;
- mango;
- avocado;
- banana;
- orange and other citrus fruits.
For cutting, it is better to choose fruits and vegetables with a flat and smooth surface, because they are easier to work with. Minimal amount pulp and seeds will also facilitate the cutting process.
Fruits are better to choose the most solid or even unripe. Do not use overripe fruits, otherwise the finished product will not hold its shape well. Thick-skinned citrus fruits are preferred.
Cucumbers and carrots are more suitable for straight, plum-shaped tomatoes, radishes and beets are spherical.

Choose the brightest vegetables and fruits so that the patterns on the peel look more spectacular against the contrasting background of the pulp.

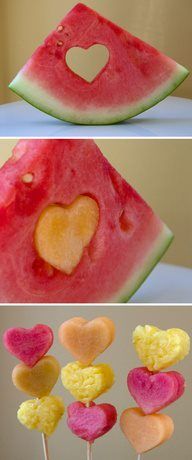
Core remover apples or pears and creating notches in patterns:
die cuts- molds with a pointed edge, thanks to which it is convenient to squeeze out the contour of the image on the surface of vegetables or fruits (just attach it to the fruit and press). Figured elements made using carvings can serve as decorations for a dish or become details of a complex composition.
curly cookie cutters Perfect for carving on vegetables and fruits.

Knife "Girol" to remove the thinnest layer from cheese and other soft products, it can also be used in Carving to create:
An analogue of this knife can be multifunctional spiral tool Slicers with stainless steel knife:
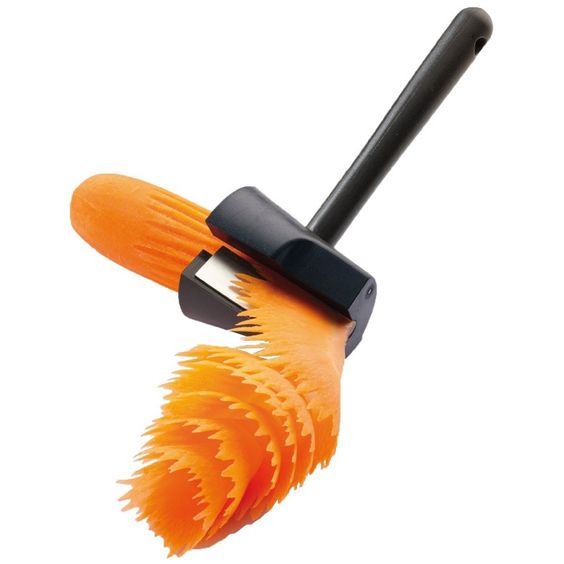
Photo from www.gearbest.com
toothpicks are irreplaceable at a fastening of vegetable and fruit preparations.
Skewers for barbecue find even more uses:
Skewers facilitate spiral cutting
Great for mini skewers

To make curls from lemon zest, you will also need skewers.
Alternative to special tools
Do not be discouraged if at the moment you do not have all the above carving tools at hand. Resourceful people have already come up with a great alternative to them!
- spicy scalpel;
- tools for ;
- eroded over time kitchen knives;
- tin can lids(bent in half, they will replace oval knives, bent to the end - triangular);

- tea spoon and a spoon for ice cream balls - a great replacement for a noisette spoon;
- for cleaning vegetables will allow you to cut long strips that can be twisted in the form of roses.
egg cutters and apple cutting may also be useful:
How to choose the right tools
- Knife blades must be free of burrs and nicks.
- The best blades are those made of high-strength stainless steel - they will not deform and oxidize during operation.
- Quality tools have an ergonomic handle that provides comfort and safety when cutting.
- Handles made of modern materials, such as polyamide, are durable and meet all hygienic requirements. They are resistant to juice, fat, detergents, do not absorb moisture and odors.
- Be careful with metal grips, they are durable but slip in your hand.
- Wooden handles absorb odors and moisture, cracks form in them rather quickly.

Carving Basics for Beginners
You should start mastering the art of Carving with the simplest figures.
Fruit carving
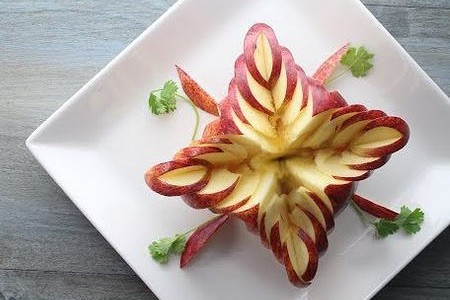
Carving on apples
If it seems to you that you need to carve only masterpieces and only on whole fruits, then you are mistaken! Even a small piece of an apple, decorated with a simple checkerboard pattern, already looks quite interesting!

How the most simple patterns are made (including the “checkerboard”) is shown in the video obento4kids:
By spending a little more time, you will give a completely different sound to your usual dishes!
Photo from kinarino.jp
Do you want to surprise your guests? Slice the apple into thin slices!

The method of carving a swan from an apple, known to many, is shown by Ekaterina Vozhova:
And you, using the same method, make a basket or:


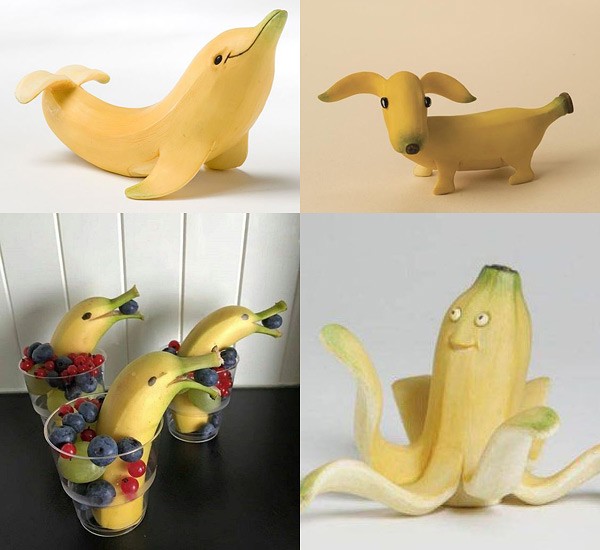
Carving on bananas is quite difficult, because. the peel is soft, and the flesh darkens quickly. Nevertheless, bananas are used as the basis for carving.

Author - Stephan Brusche
Bananas are more convenient to use in table setting. You can make dolphins - impromptu vases from bananas, as in the channel's video ItalyPaul:
And here the peacock is from a banana, and its tail is a fruit and berry cut:
Carving on oranges and other citrus fruits
Carving on citrus fruits is quite popular, especially under.

How to do pomanders- natural flavors shows Elena Perova:
Channel Fruity Fresh Juicy shows how to make a rose from an orange, and leaves from an apple:
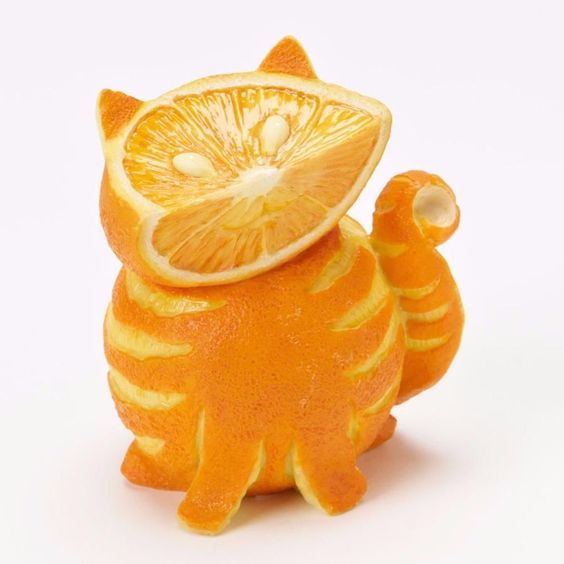
Orange cat will provide a great mood at any time of the year!
See the original ways to cut a lemon in this video:
A little more difficult to make an edible lemon basket:
And for dessert - Carving on the peel of a lemon!

Variations on a theme:

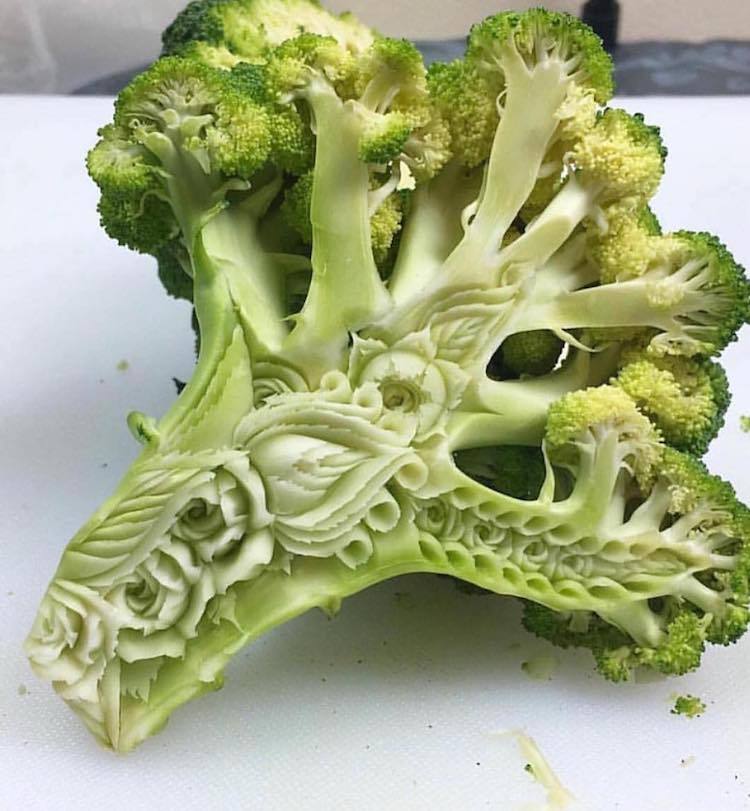
Vegetable carving
Pepper carving
Both sharp and bell peppers fit mostly:
Channel FRUITCARVING.PL teaches how to cut Anthurium from bell pepper:
Carving on carrots is very, very curious! See for yourself, you can make at least corn, at least:

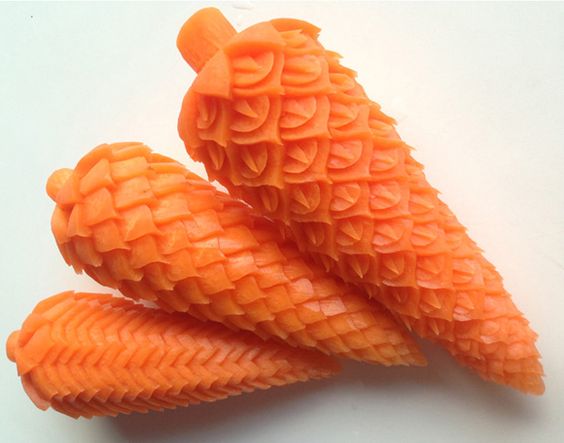
Of the simpler options - flowers and leaves:
Potato carving
Potatoes can be made not only beautiful decoration for the table, but also delicious!
It was previously mentioned that the finished work can be steamed, deep-fried and baked in the oven.
For example, if instead of ordinary potato sticks you fry or bake potato roses, you will get such a beautiful dish:
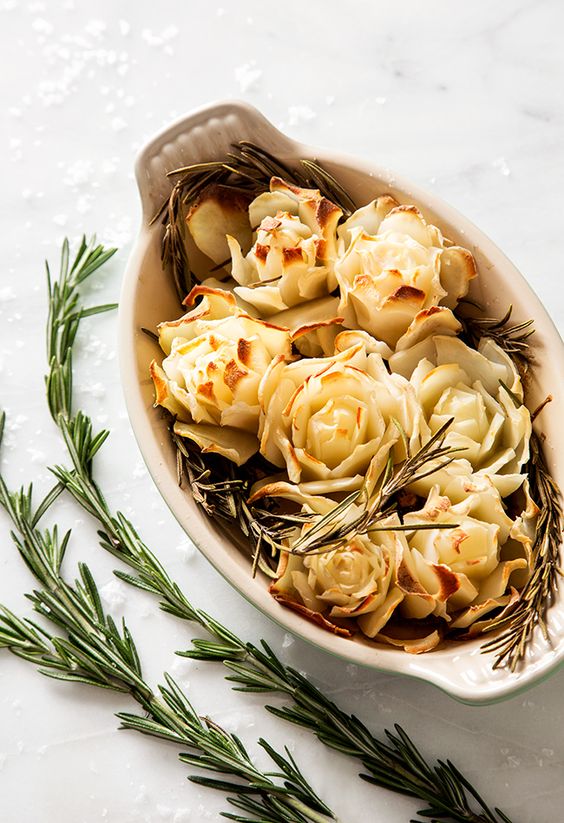
Photo from lublyou.com
How to cut potato roses
For each rose use 1 medium or 1/2 large potatoes.
- Peel the skin thinly, cut off one end of the potato in five slices so that the bottom looks like a pentagon and the top remains round.
- Use a thin and sharp knife and start cutting off a thin petal, gradually approaching the base, but not reaching it. Make 5 of these petals (one on each side of the pentagon).
- Remove some of the potato pulp all around under the first row of petals, forming the base for cutting out the second row.
- Cut out the second row of petals, alternating them with the first row. Again, remove the pulp all over the potatoes under the new row.
- Repeat until you reach the middle.
- Store finished potato roses in a bowl of cold water so they don't dry out.
- Before baking, quickly dry the roses with a paper towel, place in an oiled baking dish, sprinkle with salt, add rosemary or your favorite seasoning and bake until soft and golden.
Potato Carving is also notable for the fact that it allows you to do it on paper or fabric.

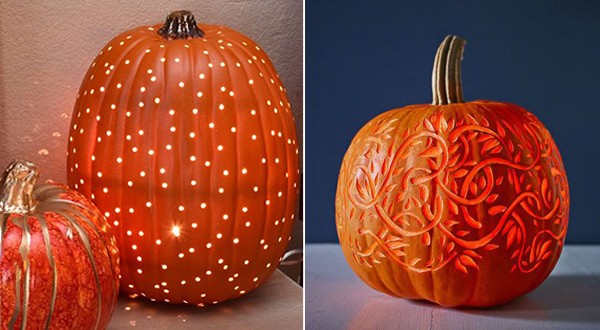
However, pumpkins can be completely harmless, even if they are lanterns...
The above examples of cutting vegetables and fruits are enough to beautifully present the most regular dish The main thing is to try to do it yourself. For more inspiration, look at examples of exquisitely set tables and carved dishes.


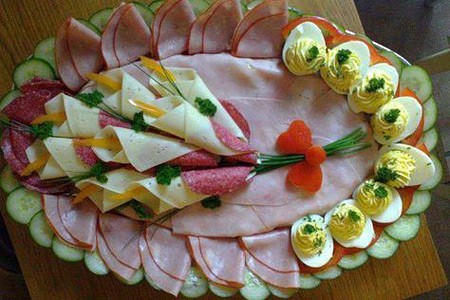
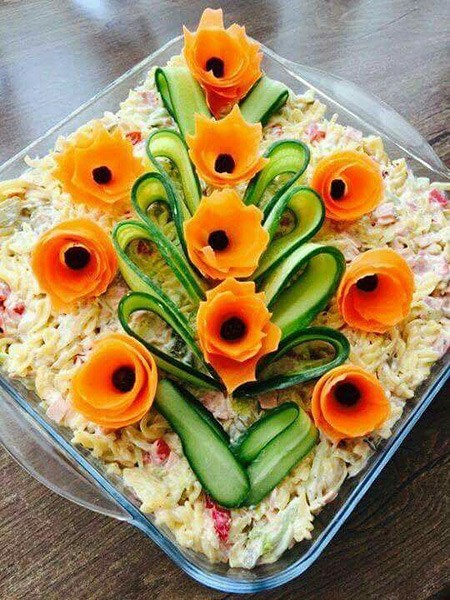
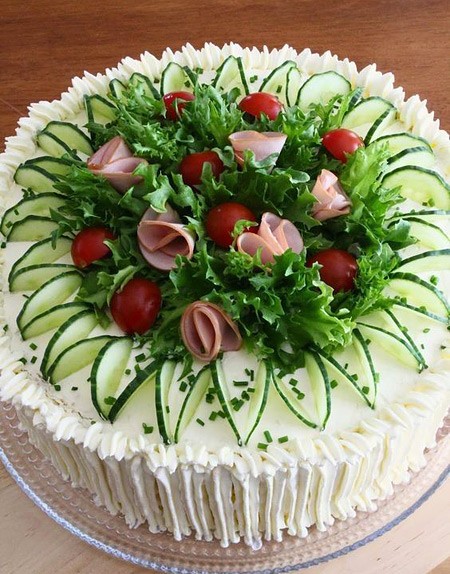

Bouquets of vegetables and fruits
In addition to decorating the table, vegetable and fruit carving can be used when compiling.

Fruit is cut and put on skewers for barbecue
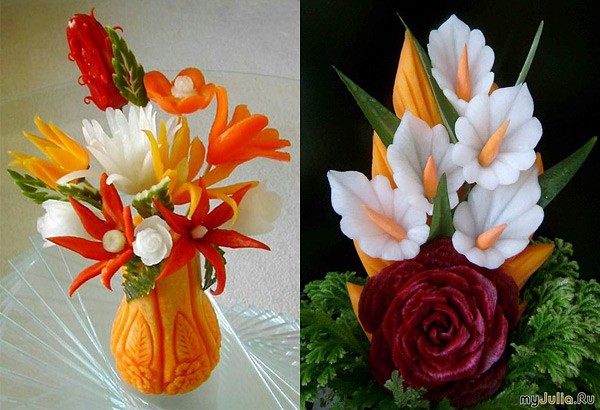
Flowers from vegetables are collected in exquisite bouquets

luxury decoration holiday table!

Photo from http://www.templeofthai.com
You can collect bouquets directly from flowers, vegetables and fruits. Most often, whole fruits are used in these, but to give the bouquet a certain “zest”, some fruits are cut in half or partially peeled:

Photo from vkusdi.ru
You can use Carving elements when composing bouquets, for example, by collecting a rose from dried apricots, as well as very carefully cleaning a pomegranate or even cutting out simple patterns on it:


Bouquets of vegetables are also very interesting if, in addition to greens and selected vegetables, some of them, for example, bitter radish, are carved:

Photo from vk.com/o_horosho
And be sure to check it out error parsing when composing bouquets of vegetables and fruits from the channel flower chef:
Interior decor
Vases for fresh flowers
Please note that citrus circles are placed in a separate container with water (larger in size), and the bouquet itself is placed in a narrower vase or transparent glass

It will be difficult for a child to make even the simplest patterns and cuts, so use awl and paper templates. The picture is superimposed on a fruit or vegetable, holes are made with an awl along the entire contour (this can be done by the child himself under the supervision of an adult), which are then cut out with a sharp knife (and it is better for an adult to do this). 

. "Cross" has collected for you the simplest options for crafts using Carving elements. They are so cute that you definitely want to repeat them!

Penguin and Pear Parrots


Snail (www.handmadecharlotte.com) and Cucumber Killer Whale


If your child is not very fond of fresh vegetables and fruits, apply fantasy and carving!
It's safest to give kids cutouts, not sharp knives!


A banana is a perishable product, so it is not suitable for crafts, but you can surprise and please your baby for breakfast or an afternoon snack!
Masterpieces of Carving Masters
Finally, so that you finally and irrevocably fall in love with Carving, we will tell you about two Masters of their craft.
Marilyn Sunderland (USA), an artist by training, practiced traditional painting until she found her true calling in carving. Namely, in artistic carving on pumpkins.

Before carving, Marilyn dries each pumpkin for about 6 months.
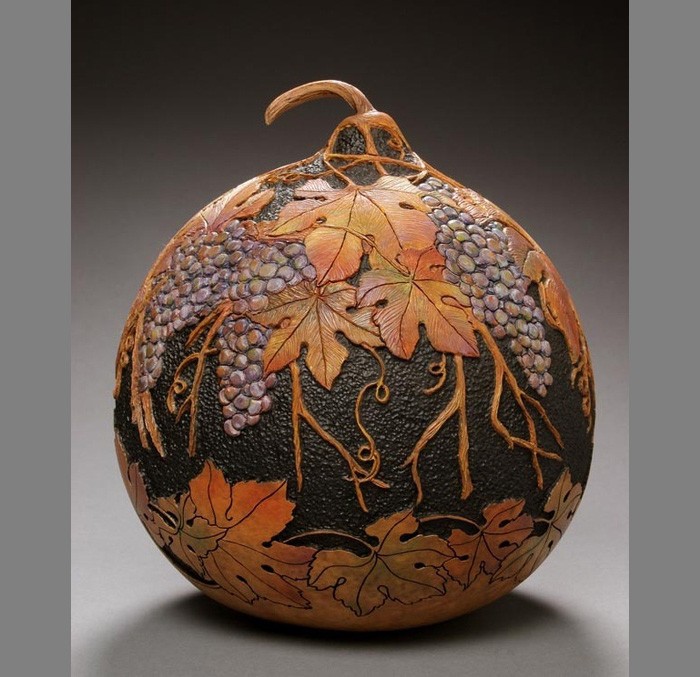

Her works are very popular with private collectors, exhibition and art galleries also buy them.

Daniel started carving at the age of 7. The first material for creativity was ordinary soap, later he tried his hand at carving and he did great!

Now Daniel Baressi is a recognized master of carving at the international level.


As Daniel himself says, he forgets about everything in the world when he starts carving. His works are so beautiful from what he creates with his heart.
CategoriesThose who want to learn the art of creating pictures from vegetables and fruits can be recommended to attend a carving master class. Carving is an artistic cutting of vegetables and fruits. Carving from vegetables and fruits is a great opportunity to come up with a composition in an original technique, decorating a festive table for a family celebration. Carving - a technique for some is so new that the name is sometimes confused - they are looking for carling or something else similar in sound on the Internet. But what if you liked the technique you saw somewhere, and you want to try to create a small masterpiece from watermelon or carrots in your own kitchen? Of course, do not be afraid, and start learning step by step. To help you - a detailed guide, training video, and pictures in examples finished works.
Carving lessons for beginners are a great opportunity to get step-by-step instructions for creating your own vegetable and fruit compositions using the figured cutting technique. Beginning craftsmen are advised to attend a master class or watch a training video, and only then proceed to making masterpieces of carving with their own hands.
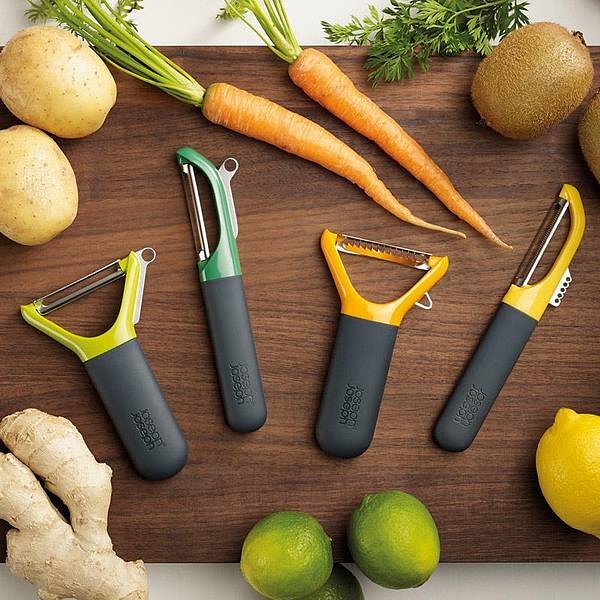
For, to master the art of vegetable carving you will need the following tools:
- a special knife with a narrow and short sharp blade;
- knife with a wide blade for the manufacture of large elements of the composition;
- knife with a long narrow blade;
- small scissors for trimming the edges of vegetables;
- thin wooden sticks (like toothpicks) for holding vegetables together.
List of the most common vegetables, from which you can create an original work with your own hands:
- pepper (hot or sweet);
- radish;
- cucumbers;
- cabbage;
- pumpkin;
- potato;
- tomato.
By attending a master class on vegetable carving, some craftsmen will learn how to create original still lifes with their own hands, using natural properties. different vegetables: color, texture, hardness. The main thing - creativity, patience and accuracy.
Gallery: carving from vegetables and fruits (25 photos)


Fruit carving for beginners
 For fruit carving you will need approximately the same tools as for figured carving of vegetables. But at the same time, it must be borne in mind that fruits have a softer and looser texture, so when working with them, in no case should you press the knife hard. If the novice master remembers this, he will be able to create a real masterpiece with his own hands. Fruit carving at a children's party will look especially beautiful.
At a fruit carving master class, beginners are usually offered to make a picture with their own hands from:
- apples of different varieties;
- citrus fruits (oranges and lemons, less often - tangerines);
- watermelons;
- melons (choose those varieties that have fairly hard pulp).
The simplest version of fruit carving- making a figured basket of watermelon or orange with your own hands. A novice master can easily cope with this work by watching a training video. The finished basket can be filled with other fruits or berries, it will serve as a wonderful gift or decoration for the festive table. And the kids will just love it. The main thing is to skillfully beat the natural properties of fruits in the work: color, texture and shape.
Figured carving of vegetables and fruits is a creative activity. You can come up with ideas for creating compositions on your own, as well as borrow from experienced professionals by watching a video or attending a master class.
However, regardless of the creative idea, when creating vegetable and fruit paintings with your own hands, you must keep in mind the following:

Other uses for carving
 Carving opens up for beginners wide scope for creativity. Beautiful compositions can be created with your own hands not only from vegetables and fruits, but also from cheese. And there are craftsmen who are engaged in artistic carving on soap. A master class and a training video can be easily found on the Internet.


