Hello dear friends. Today we will cook meatballs in Kiev. Chicken Kiev is perhaps one of the most famous restaurant dishes of the Soviet period. So big, juicy with a bone, and inside is delicious butter. Preparing a cutlet in Kiev is quite easy, quick and simple, and what is the most pleasant of simple products. What we need for this:
- chicken breast fillet with shoulder bone
- butter
- vegetable oil
- dill
- breadcrumbs or breadcrumbs
- eggs 1-2 pcs
- salt, pepper, garlic optional
How to cook cutlets in Kiev.
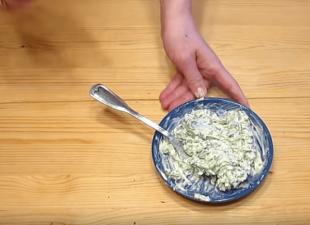
Let's start with oil. A few hours before cooking, take out a pack of butter from the refrigerator so that it warms to room temperature and becomes soft. You need to crush it in a bowl. On average, a portion of one cutlet needs 30-40 grams of oil.
Now we take dill. You can, of course, any other greens, but dill is traditionally used. Dill needs to be washed and dried, so it’s best to do this in advance too, so that it is clean and dry at the time of cooking. The more dill, the better. Dill should be finely chopped, as finely as possible. And add it to the oil. Here we squeeze a couple of cloves of garlic into the oil, through a garlic press. But garlic is not for everyone, if someone does not like it, you can not add it. And you need to mix everything well until a homogeneous mass.

Next, we form cutlets from the mass. For one cutlet in Kiev, 1 tbsp is enough. spoonful of oil. We wrap the butter patties in cling film or foil, and send them to the freezer for at least 30 minutes, and ideally for a longer time of 1-2 hours.
The oil should solidify literally to the stone. It is very important! This is one of the secrets and the key to the success of this dish. If this is not done, then the oil will most likely leak out during the process of frying the cutlets, and the impression of this dish will be far from the same.

In addition to butter, we need a chicken breast fillet with a shoulder bone. You can cook Kiev cutlets simply from chicken fillet, but if you want it to have a traditional look with a bone, you will have to work a little and cut this fillet from a whole chicken. This is how the breasts should turn out.

We will not go into details on how to butcher a chicken carcass, below the article there will be a video you can watch from 3:56 minutes.
Next, you will need to beat off a large and small breast fillet. It is advisable to beat the fillet inside a bag or cling film so that it does not stick to the board and the hammer for beating meat. It should be beaten with the smooth side of the hammer to make it thinner and not make a hole through.

The small fillet of the breast must be beaten off so that it can close the piece of butter that we have prepared. In the same way we beat off the second small fillet. We set aside the beaten small fillet directly in the film, and we will take care of the large fillet.
A large fillet must be beaten off from the inside, in the direction of the meat fibers. From the outside, it is very important to preserve the film, which, as it were, covers the fillet. This film will serve as a guarantee that the oil will not leak out.

Large chicken breast fillets vary in thickness. It is thicker near the bone. Therefore, from the side of the bone, it should be slightly cut and opened like a book in order to slightly even out in thickness.

Then you also need to beat it off from the inside, do not forget that it is advisable not to damage the film from the outside. We beat off gradually, as if stretching along the fibers. We work well on the edges, they should be thin so that the cutlet curls up well.

We also beat off the second large fillet. Salt and pepper the prepared fillets and leave for now.
The most successful option for frying cutlets is bread breading. To prepare it, you need slightly stale bread, which is 1-2 days old, grated.

Stir 1-2 eggs with a fork, add a little milk, literally a tablespoon, and a little salt.

You will also need a couple of tablespoons of flour, in a separate plate, also add a little salt.
We take the butter out of the freezer at the last moment, before we begin to form the cutlets. Take it out of the film. We unfold the fillet and begin to form cutlets.
With the help of a film, wrap the butter with a small fillet. You can put butter on a large fillet and cover it with a small one.

Then we put a small fillet on a large one and wrap it in a large oblong cutlet with the help of a film.

Then roll each cutlet in flour first. Shake off excess flour. Then dip well in the egg and breadcrumbs, and compact the breadcrumbs with your hands. Shake off excess crumbs so that they do not burn during frying.

We will shape the cutlets in a large amount of heated oil. Its level should reach at least the middle of the cutlet, or even higher. The oil should be moderately hot, because the breading burns quickly, and the cutlet should have time to fry. Fry the cutlet until golden brown on each side for 3-4 minutes. If the oil is very hot, then the breading will quickly become ruddy and the cutlet will not be fried. After the cutlets are fried, they can be put in an oven preheated to 200 ° C for 5-7 minutes. To be sure that the cutlets are exactly fried. Of course, it is not necessary to do this, but it is better to make sure that it does not work out when you cut the cutlet and it turns out to be raw.
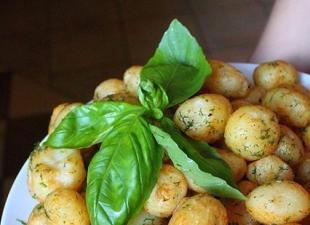
Chicken Kiev is usually served with french fries and green peas. But with french fries, the dish turns out to be too fatty, so mashed potatoes are the best option.
Enjoy your meal! Come visit us again!
Restaurants around the world serve a gourmet dish - chicken Kiev. A recipe with a step-by-step photo will help housewives cook such a delicacy at home. At first glance, the technology for creating a dish may seem complicated. Actually it is not. We offer techniques that will prove that it is not so difficult to cook chicken Kiev. The classic recipe will also reassure: the dish will require quite affordable products.
A distinctive feature of such cutlets is the use of fillet instead of minced meat. But since the classical technology requires the presence of a bone, we offer a recipe for Kiev cutlets from chicken breast, cut out with wings.
Would need:
Whole chicken - 1 piece;
Oil - 140 gr.;
· Parsley and dill - 20 gr.;
Eggs - 2 pcs.;
· Spices;
Milk - 100 ml.;
Flour - 60 gr.;
Breadcrumbs - 140 gr.
Cooking:
1. Cut out the chicken breast along with the wings to make an original Kiev cutlet. The classic step-by-step recipe starts with trimming from a thickened edge. So you will not cut the fillet and cutting will be faster.
2. Remove the skin from the breast, carefully remove the tendons.
3. We clean the wing so that the cleaned bone remains, remove the tips.
4. We divide the breast into two halves. Each of them consists of a large and small sirloin. Gently beat each one separately with a hammer with a less embossed side. The cake should be about 0.5 cm thick.
5. Classic Kiev cutlets are brought to taste only with salt and pepper. A recipe with step-by-step execution at home allows you to use spices, dried herbs.
6. Finely chop the greens. We mix it with butter, form oval shapes from the filling and put them in the freezer. This step can be done at the beginning of cooking so that the butter has time to freeze a little.
7. On a larger fillet, put the frozen filling. We close her fillet of a smaller size. We form a cutlet in the form of a dense roll the way cabbage rolls are twisted. Give an oval shape, then moisten the product a little with your hands with water and roll in flour. Again, remember that the edges are securely fastened together. Send to the freezer for 10 minutes.
8. During this time, we prepare everything you need for batter, in which the Kiev cutlet will be moistened. The step-by-step recipe is simple: beat the eggs with a pinch of salt, a spoonful of flour and milk.
9. We take out the frozen blanks and dip them in batter, then in breadcrumbs. We correct the shape, once again lower it into batter and crackers. The double breading forms a crispy crust during the frying process and becomes a barrier to oil leakage.
10. Cooking deep fat, lower the semi-finished product into hot oil. Fry until golden brown. Take out on the prepared baking sheet. Bring to readiness in a preheated oven for 15 minutes.
11. Before serving, pierce each cutlet with a skewer to release hot steam.
Chicken Kiev with cheese filling
Thanks to the use of cheese, a fragrant Kiev cutlet is obtained. A step-by-step recipe with a photo will allow you to prepare a dish that is appropriate on any table: be it a gala dinner or a family dinner.
Would need:
Chicken fillet - 4 pcs.;
Oil - 140 gr.;
Greens (standard: parsley and dill) - a bunch;
Hard cheese - 100 gr.;
Flour - 3 tbsp. l.;
Eggs - 2 pcs.;
Breadcrumbs - 150 gr.;
· Spices to taste;
· Sunflower oil for deep-frying.
 Chicken Kiev with cheese filling: recipe with photo
 Cooking:
1. For ease of preparation, we recommend starting the recipe for chicken Kiev cutlets with the filling. Grind greens, cheese, mix them with butter. From the resulting mass we form blanks of an oval shape. Wrap each in cling film and place in the freezer.
2. Separate small parts from each fillet. We beat off to a thickness of 0.5 mm, bring to taste with salt and spices.
3. We form semi-finished products: on a large part we spread the frozen filling and a slice of cheese. We cover with a small fillet and turn into a tight roll.
4. We correct the workpiece with our fingers to get an oval Kiev cutlet. The recipe with a photo gives an understanding of the correct form.
5. Then we wet our hands, dip the cutlets in flour and re-bring the shape to perfection.
6. Beat eggs with milk, flour and spices in a separate bowl. Dip cutlets in batter, then in breadcrumbs. We do the same thing again to get a double breading.
7. Fry cutlets in hot vegetable oil. A golden, uniform crust is obtained by deep-frying, but you can also use a frying pan.
8. The recipe for Kiev cutlets at home involves bringing them to full cooking in a preheated oven. This usually takes 15 minutes.
9. Before serving, check for readiness, release hot steam with a toothpick puncture and serve with a side dish.
Chicken Kiev with minced mushrooms
The combination of juicy chicken and fragrant mushrooms is appreciated by chefs around the world. They adopted the successful experience of combining ingredients and ordinary housewives. The tandem of tender chicken meat and mushrooms in a chicken Kiev is especially tasty. The classic recipe with a photo is used here as a basis. Mushrooms are the stuffing that makes the dish special.
Would need:
Chicken fillet - 1 kg.;
Mushrooms (champignons) - 300 gr.;
Oil - 140 gr.;
Green onions - 50 gr.;
Dill and parsley greens - 1 bunch;
Breadcrumbs - 150 gr.;
Eggs - 2 pcs.;
Milk - 100 ml.;
Garlic - 2 cloves;
· Spices;
· Oil for frying.
 Chicken Kiev with minced mushrooms: a step by step recipe
 Cooking:
1. The recipe for Kiev cutlets at home begins with the preparation of the filling. This will facilitate the cooking process for novice housewives. Grind the greens, mix it with oil and squeezed cloves of garlic.
2. We divide the oil mass into portions, wrap it in a film and put it in the freezer.
3. Cut the mushrooms into small pieces, fry until half cooked with chopped green onions.
4. Cooking batter from eggs, milk, flour and spices. Whisk everything well.
5. Now, according to the classic recipe for cooking cutlets in Kiev, we are preparing chicken fillet.
6. Put mushrooms on a large half with a dessert spoon. Put butter filling on top. We cover with a small fillet and turn it into a tight roll.
7. Next, we form each semi-finished product, dip it in double batter, as described in the classic recipe.
8. Fry, bring to readiness in an oven preheated to 180 degrees and serve with a side dish.
For the divine combination of tender meat and crispy crust, chicken Kiev cutlets have gained wide popularity. The recipe for this dish has changed several times. By adding various ingredients, chefs add a “zest” to the cutlet. It allows you to surprise the audience and cater to the tastes of gourmets. It is this original version of the recipe that we propose to cook right now.
Would need:
Chicken fillet - 4 pcs.;
Walnuts - 60 gr.;
Prunes - 12 pcs.;
Dried apricots - 12 pcs.;
Green onions - a bunch;
Garlic - 2 cloves;
Milk - 100 ml.;
Eggs - 2 pcs.;
· Spices to taste;
· Vegetable oil for frying.
 Chicken Kiev stuffed with dried fruits: recipe with photo
 Cooking:
1. We begin to prepare the filling for chicken Kiev cutlets. We use the classic recipe with a photo as the basis for meat cakes. Minced meat for cutlets is completely different here. For him, soak dried fruits in hot water, let them swell and rinse thoroughly.
2. We chop the washed dried fruits, nuts and onion feathers, squeeze the garlic, mix everything.
3. We divide the fillet cleaned from the tendons into a large part and a small piece. We beat off gently with a hammer with a side with a small relief. The thickness of the layer should be at least 0.5 cm.
4. Spread the beaten cakes on cling film. In the middle of each we put a portion of the filling, cover with a smaller part of the fillet.
5. We wrap the roll with a film in the same way as a Kyiv chicken breast cutlet is formed. The recipe is quite simple, the main thing is that the edges of the cakes are inside.
6. Cooking batter. For batter, beat eggs with salt, add a little milk. Then we introduce the flour so that no lumps form.
7. Roll the semi-finished products in flour, then in the egg mass, then in breadcrumbs. Repeat again the egg layer and breadcrumbs.
8. Fry cutlets in deep fat, bring in the oven.
9. Since there is no oil in the filling, the dish may seem dry. To avoid this, sauce is prepared for such cutlets. Mix the juice of 1⁄2 lemon, 50 gr. mustard seeds and 1 tbsp. l. olive oil.
10. Serve the finished dish with greens or a side dish and sauce in a bowl.
There are various recipes for chicken Kiev with butter-based filling. Made from fresh fillets, the dish comes out excellent. But no less tasty and appetizing is minced chicken cutlet according to technology, like in Kiev. Ready to experiment?
Would need:
500 gr. chicken fillet or prepared minced meat;
150 gr. oils;
· 1 bunch of herbs or mushrooms/cheese/ham optional;
· 3 eggs;
200 gr. breadcrumbs;
· Spices to taste;
3 tablespoons of flour;
100 gr. milk;
· Vegetable oil for frying.
 Minced meat cutlets, like in Kiev: a step-by-step recipe with a photo
 Cooking:
1. To make perfect chicken Kiev from breast even for a novice hostess, start cooking the recipe from the filling. The butter will need to be at room temperature to mix the ingredients well.
2. Finely chop the greens, mix with butter. Wrap the mass in a film with sausage and put in the freezer.
3. If you plan to use mushrooms, fry in small pieces. Cheese and ham go well together in this dish. Cut these ingredients into thin slices.
4. It is best to use chicken fillet. Then the stuffing will be of high quality and absolutely natural. We clean the meat from the tendons, pass it through a meat grinder with a fine nozzle. Minced meat is brought to taste with salt and spices.
5. Cooking breading in three separate bowls. In the first we pour flour, in the second - crackers. In the third, we prepare a batter from eggs, milk and 1.5 tbsp. l. flour.
6. We take out the frozen butter filling. Cut the sausage into portions of about 50 grams. The serving size should correspond to the size of the future cutlet. If you prefer large ones, measure larger.
7. With wet hands, select part of the minced meat. We form a cake, put butter inside. If you plan to add mushrooms, then put a teaspoon of fried mushrooms on the cake, then a sausage of butter and wrap it. If cheese is with ham, then put cheese on the minced meat, then butter, ham on top and wrap the stuffing in the middle with minced meat.
8. We form the semi-finished product carefully so that the contents do not shine through.
9. Dip each piece in flour, then in the egg mass and crushed breadcrumbs. Repeat the action again so that the breadcrumbs are strong.
10. Fry in a hot pan with more oil than usual. Better yet, use deep fryer.
11. In a pan, cutlets are cooked until cooked. After the formation of a golden crust, the fire should be reduced so that the middle is baked. If deep-frying is used, bring the cutlets in the oven until cooked.
It is difficult to imagine a person who does not like meatballs.
It is difficult to imagine a person who does not like meatballs. Often they are prepared from minced meat prepared from various kinds of meat, fish, poultry and even vegetables. But the classic Kiev cutlet is prepared a little differently. At the very beginning of its appearance, it was prepared as follows. The chicken fillet was beaten with a hammer, the butter in the process was simply “driven” into the meat.
Just after the meat became thin, it was salted, peppered, and then smeared with butter again. This gave the finished dish an unusual taste and tenderness. Of course, during its existence cutlet in Kiev has undergone changes, and now the hostesses put a piece of butter in it. But the rest of the sequence remained almost the same.
This is the classic recipe. The butter is wrapped in a beaten fillet, putting a chicken bone inside. This is done so that it is convenient to eat a cutlet. Then, such a “chicken leg” is dipped in an egg mixture and rolled in breading. This cutlet is sent to the refrigerator, after which it is subjected to deep-fried heat treatment.
It is worth eating such a cutlet exclusively with your hands. But be careful! The meat is very juicy so don't burn yourself.

Kiev cutlets: recipes
Of course, now there are many recipes for cooking cutlet in Kiev. Each recipe has its own subtleties and raisins. If desired, you can add various fillings to the fillet in addition to butter.
"Cutlets in Kiev original"
To prepare "Cutlets in Kiev original" you will need:
- 1 PC. skinless chicken breast
- 100 g butter
- 1 PC. egg
- 100 g white bread crumbs
- 50 g parsley
- 1\3 tsp salt
- 1/4 tsp freshly ground black pepper
- 100 g vegetable oil

Recipe for "Cutlets in Kiev original"
- Before you decide to cook this dish, make sure that you have two bones from the legs or wings of the chicken.
- Now start cooking. Wash the chicken breast. Carefully cut the fillet in half and make cuts. You need to get a big layer. It must be put on cling film, covered with it and on top. This is necessary so that the juice does not come out of the meat, and does not splatter everything around.
- After that, carefully beat the fillet. Rub it with salt and sprinkle with a little pepper. In the meantime, prepare the filling. To do this, first you need to pull the butter out of the refrigerator and let it thaw a little.
- Wash and chop the parsley. Mix thoroughly with oil. After obtaining a homogeneous mass, form small even cutlets with a spoon. Send the resulting filling for a few minutes in the freezer.
- After it freezes, proceed to the formation of cutlets. To do this, beat the egg in a bowl, chop the crackers and put on a flat plate. Put the pieces of butter and bones in the fillet, gently swaddle them. Dip the meatballs in the egg and then in the breadcrumbs.
- After that, repeat the breading process again. Put the resulting cutlets into the heated vegetable oil and fry thoroughly.

"Kiev cutlets with mushrooms"
To prepare Chicken Kiev with Mushrooms, you will need:
- 1 kg chicken breast
- 10 pieces. chicken eggs
- 20 g sour cream
- 400 g loaf
- 200 g butter
- 300 g mushrooms
- 1 PC. medium bulb
- 100 g dill or parsley
- 800 g vegetable oil

Recipe for "Kiev cutlet with mushrooms"
- To get started, start preparing the filling. Chop the mushrooms and onion, fry them together. Butter cut into small cubes.
- Wash greens thoroughly, dry and chop. Cut the breast into layers and beat well. Salt the resulting plates a little.
- Spread the mushroom mass on them, a piece of butter and sprinkle with herbs. Then, carefully wrap the cutlets and put them in the freezer.
- Prepare a breading from a loaf, beat the eggs with sour cream. Dip cutlets in eggs and breadcrumbs, then fry.
Enjoy your meal!


Today on our menu classic recipe, let's cook the Kiev's cutlets.
These are very tasty, juicy and fragrant cutlets, which, unlike traditional ones, are prepared not from minced meat, but from natural chopped meat. chicken fillet.
I will show you step by step how to cook these meatballs at home so that they get a golden crisp, tender flesh and at the same time a juicy fragrant filling remains inside the cutlets, and does not leak out during the cooking process.
Despite the fact that this dish delights any gourmet, many are afraid to cook on their own. the Kiev's cutlets.
The fact is that there are certain subtleties of their preparation, which I will talk about in detail today and show everything clearly.
You will know everything cooking secrets this restaurant dish, which you can independently embody in your kitchen, and I am sure that you will definitely succeed!
LIST OF INGREDIENTS for 8 cutlets
FOR CUTLETS:
- 4 large chicken fillets (~1.4 kg)
- 200 g butter
- 1 tsp lemon juice
- dill and parsley
- pepper
![]()
FOR BREAKING:
- flour (~200 g)
- 4-5 eggs
- white bread (baton)

FOR FRYING:
- 1 l refined oil
CLASSIC KIEV CUTLETS - STEP-BY-STEP RECIPE
To start, let's prepare filling for our cutlets - fragrant green butter.
We take out good quality butter in advance from the refrigerator and leave it in the kitchen so that it becomes soft.
Dill and parsley, which I previously washed and dried, chop as finely as possible.
Pour the chopped greens to the soft butter, add salt and 1 tsp to taste. lemon juice.
Depending on the chef's preference, lemon zest or minced garlic can be added to the oil.
We mix everything well until the lemon juice combines with the oil.
We transfer the finished mixture onto cling film or into a plastic bag, forming an oil “sausage” and put it in the freezer until completely solidified, as a rule, half an hour is enough.
In the meantime, let's prepare the chicken fillet.
Ideally, one chicken Kiev cutlet is prepared from one chicken breast fillet - this was the case in Soviet times, when chickens were small.
Now everything has changed - broiler chickens are sold in stores, and if you cook a cutlet from such a large fillet, then it will be just huge.
Therefore, from each fillet I will cook two cutlets.
Classic Kiev cutlets are cooked on the bone, and in order to properly cut the fillet for these cutlets, we need a whole chicken.
And today I will show both options for cooking cutlets - both on the bone and without it.
We lay the well-washed and dried chicken on its back, and make a deep incision along the keel bone, on one side.
We remove the skin so that it does not interfere with us and cut the fillet close to the costal bones, reaching the shoulder joint, and then carefully cut the fillet along with the wing along the joint.
We got a fillet along with a wing.
We cut off the two extreme phalanges and leave only the humerus (it is also called the wing bone), which must be completely cleaned of skin and meat, also removing part of the external joint.
If everything is done correctly without damaging the tendons, then the fillet itself, and later the finished cutlet, can be safely held by the bone.
The main thing is that the knife should be as sharp as possible.
We remove both fillets, and we do not need the rest of the chicken in this recipe.
We remove the skin from the second fillet, cut off the wing along the joint and clean the humerus, not forgetting to cut off part of the outer joint.
As a result, it turns out that only two real cutlets on the bone are obtained from one chicken, and this is not rational, and given that very large chickens are now being sold, the recipe has become simpler over time and now most often Kiev cutlets are made from ordinary chicken fillet, bought in the shop.
Both fillets are very large, so I will make two cutlets out of each, in the end I will get 8 cutlets, two of which will be on the bone.
As you know, chicken fillet consists of two parts - small and large.
We cut off the small fillet, we will need it a little later, and carefully cut the large one lengthwise into two parts equal in thickness.
As for the fillet on the bone, we also cut off the small fillet, and cut the large fillet lengthwise into two parts, in this case we get one fillet on the bone, and the second without it.
If you are preparing a Kyiv cutlet from a small chicken, then cut the fillet lengthwise on one side, but not completely, and then open it like a book.
The fillet is prepared, and now it is necessary to beat it off.
To do this, we need cling film or, like I have a plastic bag.
Let's start with a small fillet.
You need to beat off with the smooth side of the kitchen hammer so as not to tear the delicate fibers.
There is a common mistake when chicken meat for Kyiv cutlets is beaten with a serrated side, while it breaks and turns into a “hole”, and at the time of frying the cutlet, the juicy oil filling flows out.
The small fillet fought back well!
You can easily make a full-fledged cutlet from it, and since we are preparing a classic recipe, it will still come in handy for us, but more on that later.
Try to beat the fillet very carefully, as if “stretching” it from the center to the edge in the direction of the fibers.
Our task is to get a meat layer that is even in thickness within 3-4 mm.
In the same way we beat off a large fillet.
Considering that it is thinner at the edge, and much thicker at the base of the bone, the thick part must be beaten off more strongly, if necessary, periodically lifting and leveling the film.
Please note that the fillet is beaten off only on one side.
Those parts of the chicken fillet where there is a smooth film on the outside must be beaten off from the inside without damaging the integrity of this film, which serves as an additional guarantee that the juicy filling will not leak out of the cutlet.
If you do not have a mallet with a wide smooth surface, use a regular rolling pin for dough, with which you can beat off the fillet and roll it out slightly.
While we were preparing the fillet, the oil was completely frozen and we need to divide it into 8 oblong parts according to the number of cutlets, this will be their juicy filling!
Ideally, each piece of butter is pre-wrapped in a small fillet, but since there are only 4 of them, we cut each piece in half and wrap the butter filling with it.
Thus, wrap each piece and, until the butter begins to melt, proceed to the formation of cutlets.
Salt and pepper the prepared chicken fillet.
Along each layer in the center, lay out a piece of cold butter, covered with a thin strip of small fillet, if possible, tuck the edges and twist tightly, pressing from all sides and giving the cutlet the shape of an ellipse.
The oil in the cutlet must be completely covered by the chicken fillet, otherwise it will leak out during frying.
Thus, we form all the cutlets.
In addition to the classic butter filling, grated cheese, fried mushrooms, boiled egg yolk and even ham can be added to the cutlet, but this is optional.
The semi-finished products are formed and now we send them to the freezer for at least half an hour so that the butter does not melt prematurely, the breading keeps better on the meat preparation, and the cutlets themselves retain their perfect shape.
While the cutlets are cooling, prepare the breading.
For this we need flour, eggs and bread crumbs.
It is most convenient to bread in a wide dish, for example, in a deep plate.
Pour the flour into one of them, and beat the eggs into the other to prepare the lezon.
Depending on the size of the cutlets and the size of the eggs themselves, on average, you will need half an egg per cutlet.
I'll take 6 pieces as they are not very large.
We add them lightly and shake them with a fork, it is not necessary to beat strongly, at the end of mixing you can literally pour in a tablespoon of water or milk, but this is not necessary.
Now let's get to the bread crumbs.
In the classic recipe for Kiev cutlets, breadcrumbs are not used, we need bread crumbs, the so-called white breading.
I have already prepared part of the breading, and now I will show you how to do it.
For such a breading, white bread is needed, it can be a loaf or a white unsweetened bun.
It is better if the bread is slightly stale, for example, yesterday, but not crackers.
It is most convenient to grind such bread in a blender, and if you have very soft fresh bread, then in order to make fluffy white crumbs from it, I recommend freezing it first, and then grinding it in a blender or grating on a coarse grater.
When grinding with a blender, adjust the crumb size yourself.
This is the white coat!
It turns out very soft, tender, light and crumbly, while not at all dry, just perfect for making Kyiv cutlets.
In the meantime, we were preparing products for breading, the cutlets cooled well, but did not freeze - what we need.
In the classic recipe, Kiev cutlets are breaded in double white breading.
To begin with, bread the cutlet in flour and shake off the excess, then send it to the egg, and in order not to bread your fingers, it is better to use two forks.
Next, we shift the cutlet into bread crumbs and for high-quality breading at this stage it is very important not just to lightly roll the cutlet in crumbs, but to pick it up and press it further, as if to “glue” the breading to the previous layer.
Then we send the cutlet once again to the egg and again breadcrumbs in breadcrumbs, lightly pressing them with our hands.
With this action, we not only fix the breading well, but also set the final shape of the “boat” to the cutlets.
Shake off excess crumbs well so that when frying cutlets in oil, they do not sprinkle and do not burn.
This is double white breading, in the same way we bread all the other cutlets.
To easily remember in what sequence to bread any semi-finished products from meat, poultry and fish, there is a long-known hint.
Remember the keyword “MEAT”, each letter of which means the procedure for breading, where the letter M is flour, I am an egg, C is crackers (in our case, bread crumbs), O is roasting.
So you will never get confused and forget what is what, but remember that Kyiv cutlets are breaded in double white breading.
Cutlets on the bone are breaded in the same way, but before frying, the breading from the bone itself will need to be removed.
At this stage, breaded semi-finished Kiev cutlets can be sent to the freezer for long-term storage. During the preparation of deep-frying, we put them in the refrigerator so that the breading dries out slightly and the oil inside the cutlets does not melt.
We install a deep pan, cauldron or stewpan on the stove and pour a sufficient amount of refined oil so that the cutlets are completely covered with it when frying.
Let me remind you that for safety reasons, you need to pour the oil into a completely dry dish.
We heat it up to 160-170°C (320-338°F), but if you don't have a kitchen thermometer, you can easily determine the right temperature with a regular toothpick.
We lower it into the oil and if bubbles appear around the toothpick, then the oil has reached the desired temperature.
We take the meatballs out of the refrigerator and start frying. be careful, the oil is very hot!
We lower the cutlets into deep fat and fry until golden brown literally for 1-2 minutes, while inside the cutlet remains almost raw.
The frying time depends on the intensity of heating, the volume of oil, and the number of cutlets being fried at the same time.
At this stage, our task is to get a crispy golden crust, and we will bring the cutlets to readiness in the oven.
When frying cutlets on the bone, do not forget to peel it from the breading.
Thus, we fried all the cutlets.
We send them to an oven preheated to 180 ° C (356) and bring to readiness for 12-15 minutes.
The readiness of cutlets is determined by the presence of small air bubbles that appear on their surface.
As soon as the cutlets "hiss" - this indicates that the liquid inside has reached the boiling point, which means that the tender chicken fillet is completely ready!
It took me 15 minutes.
At this stage, it is important not only to wait for the cutlets to be ready, but also not to overcook them, otherwise they may burst, and the juicy filling will end up on the baking sheet.
We take out the finished meatballs from the oven.
Here we have such beautiful, ruddy cutlets!
They keep their shape perfectly, everything is whole and the filling has not leaked out!
And now the long-awaited moment, let's cut the cutlet and see what we got?!
Be careful, the oil inside is very hot and may splatter, but to balance the pressure, pierce the patty with a fork, and then cut.
Our Kyiv cutlet turned out to be very appetizing, with a crispy golden crust!
Tender chicken fillet is completely ready, and when cut, fragrant oil flows out of the cutlet!
That is why chicken Kiev should be fried immediately before serving and served to the table, as they say, "hot, hot."
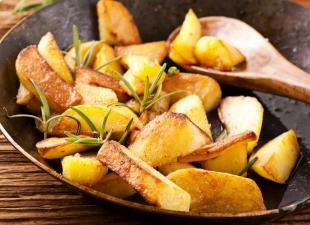
As a rule, in restaurants, such cutlets are served on croutons with deep-fried potatoes and green peas.
If the cutlet is on the bone, then they put a papillot on it, and I’ll tell you how to make it now.
We take a thick napkin or a sheet of paper, cut off a strip about 10 cm wide, fold it in half lengthwise and make cuts from the fold side every half a centimeter from each other, but not completely.
We turn the paper inside out to make the papillot more voluminous and wind it a few turns on a stick, pencil or any other object of a suitable diameter.
Adjust the number of turns as you wish.
You can fix the papillotte with a thin strip of tape or a stapler.
This is how quickly and simply these decorations are made, which allow you to hide a bare bone, but in addition to aesthetic purposes, they also have a practical purpose - they play the role of a handle by which you can hold a cutlet, cutting it into portions and at the same time not dirty or burn your hands.
👆Subscribe in 1 click
Dina was with you. See you soon, new recipes!
CLASSIC KIEV CUTLETS - VIDEO RECIPE
CLASSIC KIEV CUTLETS - PHOTO


Juicy and tasty cutlets in Kiev differ from traditional ones in that they are prepared not from minced meat, but from beaten chicken fillet. Biting into a tender fragrant cutlet, you find butter inside with various additives - herbs, mushrooms, boiled eggs and grated cheese. In the most “correct” cutlets, a chicken bone sticks out on the side, on which they put a papillot so as not to burn their hands. And of course, the most important thing is how to learn how to make chicken Kiev at home so that they have a crispy crust and tender juicy pulp. It is quite real and will not take much time. Let's try!
Butter filling for Kiev cutlets
First we make the filling, and then we do the meat - this is one of the cooking rules. Since the base of the filling is butter, remove it from the refrigerator and let it thaw until it becomes soft. For the filling, it is better to take very high-quality oil with 82.5% fat content: the better the oil, the more tender and tastier the cutlets.
It is no coincidence that butter for the filling is called green - we need fragrant greens. Grind dill, parsley, cilantro and mix with butter, add grated hard cheese to the mass, salt and form thick sausages. It is best to do this as quickly as possible so that the butter does not start to melt. For 80 g of butter, take 8 g of cheese and a bunch of dill - from this amount of products you will get 4 sausages. Or you can just roll the pieces of butter in chopped dill. Put the green butter in the freezer and get on with the meat.
The best meat for Kyiv cutlets is chicken breast

They make cutlets from chicken fillet, that is, from chicken breast, and since the chicken has two breasts, you get two cutlets. For this reason, they are considered a delicacy, because to fry four, six, eight cutlets, you need several chickens. However, now you can easily buy chicken breast in the store, but if you want to cook a classic cutlet with a bone, you will have to buy a whole carcass. And now let's prepare the meat for the Kiev cutlet, a step-by-step recipe for this process will help you figure out how to properly cut and beat the fillet.
1. Rinse the chicken well, lay it on its back, remove the skin from the meat and make a deep cut along the keel bone, which runs vertically in the middle of the breast. Help yourself on the other side by flipping the fillet and making a cut on both sides.
2. When carving the breast, leave the wings if you plan to cook a classic chicken Kiev. From a ready-made chicken breast bought in a store, a cutlet will turn out without a bone - this is also delicious, although it looks more like a roll.
3. So, you cut out the breasts with wings, and now remove two fragments from the wings, leaving only the humerus, which is firmly attached to the sternum by tendons.
4. Clean the humerus from the meat, using a sharp knife, and remove the joints at the ends. Now future cutlets resemble a leg with a bone - that's how they should look.
5. You probably know that the composition of the chicken breast includes large and small fillets, and now you have to separate them from each other with scissors or a knife. For cooking cutlets, both parts are useful to us.
6. Wrap large and small fillets in cling film and gently beat with the flat side of the mallet until you get a cake 4-5 mm thick. If you beat the fillet with the serrated side, you will get minced meat, so it's best not to try. If you overdid it a little and holes appeared in a thin layer of meat, it’s not scary, you can close them with another fillet, and when you dip the cutlet in batter and fry it, the “defective” places will generally become invisible.
We make rolls, bread cutlets

The main thing is to do everything right. Wrap the butter-cheese sausage in a small roll sprinkled with salt in the form of a tight roll, salt the large fillet, place the roll in the middle and wrap again. Another way to form cutlets is that a piece of butter is laid out in the middle of a large fillet, covered with a small fillet, and then twisted into a roll, like cabbage rolls.
Try to make the product tight and dense enough to protect the oil from leakage, for this, remember the cutlet in your hands, giving it the desired shape. And now lightly moisten the surface of the fillet with water, roll in flour and remember a little more - the edges of the meat should stick together, then the cutlet will take on an appetizing look. Dip prepared foods in batter, which is made from 2 eggs beaten with 1 tbsp. l. flour and a pinch of salt, and roll in breadcrumbs. You can add a little milk to the batter - for tenderness and airiness. And now continue to work on the shape of the patty - it should be perfectly smooth, beautiful, resembling an ellipse. Then repeat the procedure with batter and breading again - double breading does not allow the oil to leak out and creates a crispy golden crust, which is an attribute of Kiev cutlets.
How to fry chicken Kiev

Lightly blot the pieces with a paper towel to remove excess moisture, otherwise the oil will sizzle and splatter. Fry the cutlets in a large amount of hot vegetable oil, brought to a boiling point - bubbles must appear in it. You can fry in a deep fryer or in a pan - until a beautiful golden color, which will take about 3 minutes on each side. It is not recommended to fry longer, otherwise the rolls will burn easily - you still have to bring the Kiev cutlets to readiness in the oven.
So, after frying in a pan, cover a baking sheet with baking paper, put meat rolls on it and bake for 15 minutes in an oven preheated to 180-200 ° C. The readiness of the cutlets is easy to check - carefully cut them, if juice starts to flow from the pulp, the dish is ready!
And one more subtlety - before serving the cutlets on the table, pierce them with a fork so that the steam comes out, otherwise hot oil will squirt out of them when biting. Chicken Kiev can be served with baked vegetables, mushrooms, crumbly rice or potatoes. It's extraordinarily delicious!
Five secrets of cooking Kiev cutlets

Secret 1. Cut the chicken fillet only from the thickened edge - this way the process will go faster and you will not cut through it.
Secret 2. If you remove the tendons from the fillet, the cutlets will turn out more tender and softer. Some cooks recommend cutting them a little in several places so that the cutlets do not shrink when frying.
Secret 3. Add some spices and dried herbs to the breadcrumbs, and Kiev cutlets will delight you with new tastes and aromas.
Secret 4. Wrap the cutlets in cling film and put them in the freezer for 10 minutes before breading. In this case, the oil will harden and will not flow out during the "sculpting" process. Some housewives put cutlets for 10 minutes in the freezer and after breading.
Secret 5. If you do not have time, and the guests are already on the doorstep, you can simplify using minced chicken. Make a minced meat cake, put the butter filling inside, and then wrap the cutlet with a roll.
Pork Kiev cutlet

This, of course, is not a classic, but it is also very tasty. Take 400 g of pork tenderloin or any part of the carcass without fat and fat. Make a filling with 100 g of softened butter, 2 cloves of minced garlic, a finely chopped bunch of parsley and dill, a pinch of salt. Put the butter on cling film, form sausages and put in the freezer.
Cut the meat into layers about 0.5-0.7 cm thick, beat with a hammer, but carefully so as not to tear it. Rub the meat with salt and pepper, make a batter of 2 eggs, salt and spices, beat well and remove the butter sausage from the freezer. Cut it into pieces, put on meat cakes and twist them into tight rolls. Roll cutlets in flour, dip in eggs, and then in breadcrumbs mixed with spices for meat. Double or triple breading and fry the patties in oil, making sure they float in it. Heat the oil, and then reduce the heat to a minimum and fry the cutlets for 3 minutes on each side. You can let the cutlets bake in the oven or serve them immediately with a fragrant side dish!
Chicken Kiev: Mexican Recipe

This dish is great for winter, because its spicy heat pleasantly warms and does not freeze. For the filling, mix 5 tbsp. l. butter, 3 tbsp. l. hard cheese cubes, 2 tbsp. l. finely chopped canned chili peppers, 2 tsp. dried onion and ½ tsp. salt. Roll into balls and freeze them.
As a breading, Latin American gourmets use crushed crackers - you will need 1 cup of cheese crackers and 1½ tsp. taco seasonings. It contains paprika, oregano, cumin, chili, cayenne, garlic, dried onion and basil, so you can make your own.
Gently beat 6 chicken breasts, approximately 160-170 g, with a hammer. Put a ball of butter on each chicken tortilla, roll, dip in melted butter, roll in cracker breading and secure the rolls with toothpicks. Put them in a microwave-safe dish and bake for 15 minutes on high power, and then remove the toothpicks. The inhabitants of Latin America do not claim to be the author of Kiev cutlets, but they treat this dish very reverently.
Any sauce can be prepared for cutlets - mushroom, milk, cheese, tomato, garlic, vegetable, fruit and berry. The taste of cutlets will improve, and the dish will look very bright, original and spectacular, and loved ones will certainly express admiration for your culinary skills!