Salt dough is a great building material for small children as young as one. Manual creativity develops fine motor skills and imagination of the child, which favorably affects his development.
Unlike clay or plasticine, salt dough has several advantages:
- easy cooking process
- does not leave marks on clothes;
- consists of a natural product and does not pose a danger to the child;
- when trying to eat salty dough, the child will not have a second desire to do this because of the unpleasant taste;
- children's hands can easily mold any shape from the dough, plasticity is higher than that of plasticine;
- dried either in the oven or in the fresh air;
- the dough can be dyed in any color and can be painted as you like;
- you can save a creative product made by a child for many years if you cover the salt dough with varnish;
- the product can be used as a toy.
For children aged one to one and a half years, salt dough is the only recommended and safe option. Modeling from plasticine and clay should be considered as a creative activity in an older age.
Salt dough recipe
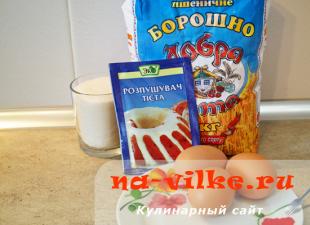
There are many variations of the recipe, but the basics remain the same. You will need to mix the ingredients in one container in the following proportions. Salt - 3/4 cup, flour - 1 cup, vegetable oil - 5 tablespoons and a small amount of warm water.
If you need to color the dough, consider the age of the child. For adult preschoolers and younger schoolchildren, gouache can be used, and for children of younger preschool age, natural dyes can be used. For example, coffee, beet juice or carrot juice.
It is recommended to cover the dough with a glass to prevent drying out. If the creation process made too much dough for one time, put the unused part in the refrigerator. A closed jar or bag is suitable as a storage container. The main thing is to prevent the evaporation of moisture.
If the child and you liked the result, put the product in the oven and heat at a low temperature. Make sure the dough doesn't crack.
After cooling, you can paint the craft or varnish it.
Test Exercises
Children love to sculpt figures from salt dough. Even at an early age, they are interested in subjecting him to various transformations. At the first acquaintance with the material, the child may not understand what is required of him.
Show your child step by step how to work with the dough and help create some shapes. After he understands the principle, it is recommended not to give any advice and watch the flight of fancy, because even at the age of one year, the child able to independently sculpt different shapes.
The first exercise is to pinch off a piece of dough with two fingers, and then stick it back. After that, have the child slam the palm of the hand on the dough, then with the edge of the palm. After that, you need to roll out the sausage from the salt dough.
Make bagels out of salt dough and give them to your baby. He can put them on a string or mold miniature sweets that can be wrapped in paper, imitating a candy wrapper. This exercise will direct the baby into the mainstream of sculpting various objects.
Let the child create impromptu beads from salt dough. To do this, you need to roll out a few balls and bake them in the oven, and then color them. Wearing such jewelry is not recommended.
In addition to the exercises mentioned above, we offer a few more:
- let the child stick around a glass, jar, walnut or other object with dough;
- Roll out the dough and cut out shapes using cookie cutters or a glass. After decorating, crafts are perfect for decorating a Christmas tree for the New Year;
- sculpting letters from dough allows you to teach your child how to compose words and read.
Additional test tools
For sculpting figures from dough, you can use not only your hands. After mastering the basic skills, provide the boy with some tool. For example, a cutting board, a small blunt knife, a rolling pin, a colander. The list goes on.
Cookie molds are also useful for gaining knowledge. The child will learn to recognize physical shapes, including circle, rhombus, square, triangle.
Pay attention to the child and make salty dough for him. Working with him guarantees the accelerated development of the baby's mental abilities and further success in the educational process.
You can test or develop your creativity by using not only proven materials, such as plasticine or clay. It is quite possible to create various souvenirs and items for gifts to relatives and friends, taking salt dough as a basis.
It is actively used for modeling and developing activities with children, since the ingredients included in the composition are completely natural and safe. In order for the finished elements not to crumble, a large amount of salt is added to the dough. You can make a variety of colors and shades using safe food dyes.
In addition to decorating baking dough and other edible products, the use of this product in a composition supplemented with other components allows you to create very spectacular, unusual, unique and beautiful decorative ornaments, figurines that can be additionally painted, pictures, flowers and other details for decorating and improving the interior.
The use of salt dough is ideal for introducing children to creative activities and needlework, as it allows you to achieve good results, but the cost of the ingredients is accessible to everyone without exception.
This material is also used by adults, as it helps to focus on work, relax and unwind, which is very useful for relieving stress and tension.
Dough is a material that has its own characteristics. They must be known and taken into account so that the craft made on its basis is of perfect quality. The subtleties of working with it are in the increased plasticity of salt dough.
Modeling is carried out according to the same principle as the creation of crafts from plasticine, but a person receives a number of undeniable advantages:

In turn, there are a number of difficulties that a person who decides to start modeling from dough with salt may encounter:
- It is necessary to prepare the dough according to the rules so that it does not stick to your hands;
- Errors in proportions, preparation or drying process can cause the finished product to crack.
It is important to remember that pancake flour is not used to make salt dough for modeling crafts, since its consistency and composition are not suitable for obtaining high-quality material. The salt that is included in the composition should be fine, as large particles will cause cracking of the finished product.
In addition, the dissolution time of coarse salt in water is long, which will delay the process of creating crafts. There should be no foreign impurities in the salt, as they will spoil the appearance of the dough and will not allow to achieve a uniform composition.
The kneading process should be carried out in cold water (it is better to cool it to an ice state). In this case, the dough will turn out to be of high quality, pores will not form, as a result of which it will turn out to be of high quality.
simple recipe
In order to get salty dough for modeling, you can use the simplest ingredients. The mixing process is carried out manually or with a mixer. The second option is preferable when it comes to large volumes or there is a need to obtain a smooth, elastic dough.
In order for the finished product to not crumble for subsequent modeling of various products from it, the salt will need to be poured with cold water in advance, and then thoroughly mixed with flour, it is important that no lumps form at this stage. A simple recipe calls for the following ingredients:
- flour (any, except pancake) - 200-250 g;
- fine salt (without additives) - 200-250 g;
- water (ice) - 100 - 125 ml.

All components must be mixed in a container, then knead by hand or with a mixer until smooth. This easy recipe is perfect for making details like flower petals, curlicues, and intricate embellishments.
Salt dough for modeling crafts - a recipe for children
It is important to use natural ingredients to prepare the base for sculpting dough, especially when children are involved in the work. The recipe that can be used in this case consists of simple and affordable ingredients:
- flour - 250 g;
- fine white salt - 250 g;
- sunflower oil - 5 tbsp;
- baby cream - 5 tbsp.
All ingredients should be mixed, add water, stir until a homogeneous mass is obtained. The result is a salty dough with a pleasant aroma that children will love.

The best salt dough recipe for modeling with children
This recipe will allow you to get high-strength salt dough, so it is ideal for children's creativity. You will need to take the following ingredients:
- flour - 200 g;
- salt - 200 g;
- potato starch - 100 g;
- cold water - 150 ml.
All components should be mixed in a container, then knead using a mixer or just by hand. The starch will perform the task of a natural adhesive substance, as a result of which the crafts in the dried state will be strong and durable.
Everyone who is engaged in creativity wants his work to be perfect. That is why there is an improved recipe for modeling material, which is used for creativity. This option is best used to create interior items by adults, as it includes chemical components. The recipe includes the following ingredients:
- wheat flour (or rye) - 375 g;
- fine salt - 200 g;
- water - 125 ml;
- PVA glue - 2-3 tbsp.
You can use any other glue that can dissolve in water, such as wallpaper. The dough obtained from such components perfectly holds the given shape, is suitable for working on thin elements and complex shapes.
How to make salt dough for modeling crafts? ? The dough is prepared by mixing all the ingredients into a homogeneous mass. Experienced craftsmen can create things from it that visually do not differ from porcelain.

How to make colored salt dough for modeling
The figures obtained from the salt dough will be yellowish and visually not very eye-catching. To achieve special effects, crafts will require additional coloring, but sometimes you need to get a colored figurine right away.
To do this, you can prepare a color composition. Its recipe is easy to reproduce, you will need to have the following set of ingredients on hand:

The process of making dough for crafts is to mix all the components in a container. After that, you need to knead them until a homogeneous mass is obtained.
In order to prepare high-quality salt dough, you will need to purchase flour of the highest quality or “extra” class - this ensures that it will turn out to be uniform in color and composition, and will not crack when dried.
Salt is also used fine (not iodized).
Rock salt is excluded because its particles are too large and can damage the workpiece.
The finished product must undergo a drying process before being used to decorate the interior. You can do this in several ways:
- Bake in the oven at a temperature not exceeding 80 degrees, laying out the craft on parchment. Drying time is 60 minutes. The product must remain in the oven even after it is turned off until it cools completely;
- Drying in a cold oven - the products are laid out on parchment, but placed not in a heated, but in a cold oven. After that, you need to turn on the heating, heat the workpiece and turn off the oven. Then wait for the workpiece to dry and cool completely.

Crafts made from dough can also be dried naturally, but this will take more time (from several hours to a day, depending on the volume or number of blanks). As a result, the product will turn out to be strong and solid, the possibility of burning is excluded.
It is important to remember that for products made from dough with salt, it is forbidden to use various electrical appliances for drying, such as a hair dryer or heating radiators.
They produce the drying process unevenly, as a result of which the quality of the product deteriorates sharply, for example, it may crack or dry out only on the outside.
What can be done with salt dough
Creative work involves a flight of fantasy and self-expression. In the case of working with salt dough, a person is also practically unlimited in the choice of molds for modeling. If children are included in the work, then you can create berries and fruits, animal figures and flowers.
Toddlers can try to recreate their favorite toys in the test. It is ideal to mold a lamb or a snowman from uncolored salt dough.

Over time, when experience appears, the complexity of products can be increased, compositions can be assembled, paintings, photo frames created. Bouquets of flowers that look like real ones are considered the pinnacle of craftsmanship. The options are varied, so a person can experiment and create completely freely.
How to deal with possible problems
Creativity is impossible without mistakes and difficulties, especially during the learning period. Salt dough modeling is no exception. Even in the case of painstakingly done work, defects may appear - chips and cracks.
Cracking occurs for several reasons:
- Errors when creating a test;
- Incorrect drying of the finished product.
If the cracks are not deep, there are few of them, or they form a mesh on the product, then you can fix the problem with sandpaper - you will need to sand the area with cracks. They can also be puttied by applying a liquid consistency of water, flour and salt.
If a piece or part of the decoration has broken off from the product, then applying PVA glue to the broken place will help to correct the situation. After attaching the part, you will need to wait for it to dry completely.
After that, the place with the defect will need to be sanded and covered with a colorless varnish for reliability. You can also replace the breakaway part - make a similar one from fresh dough. For strength and reliability of fastening, you will need to additionally glue the elements and varnish them on top.

Thus, simple ingredients that are available in every home - water, salt and flour, can be a great option for creativity. Salt dough will help children to reveal their creative potential, and adults - to improve their skills in creating items for decorating the interior.
Another recipe for salt dough is in the next video.
Our ancestors also loved to make interesting figurines from dough. Now modeling from dough is especially popular, because it gives a huge scope for imagination. After all, a molded figure can be painted in various colors, which cannot be done when sculpting from plasticine. But you can’t make salty dough for crafts from every type of flour! It also has its own little secrets. Want to make craft dough that doesn't crumble? Choose the right salt and flour. And paint the resulting figure better with food coloring so that the colors are especially bright.
Children simply love to make dough figures, and this technology is the safest for them. If the dough gets into the child's mouth, nothing bad will happen. Advice to a kindergarten teacher: cook the dough at home on the weekend, wrap it in a plastic bag, let it lie in the refrigerator until the start of the working week, and bring the dough to the group on Monday! Children from the middle and senior groups of the kindergarten will be happy to take part in modeling. Ask to bring buttons, beads, rings, figured sets for plasticine from home.
Advice on ingredient selection
We take the simplest flour, without various additives. Do not take flour with the inscription "pancake", "for pizza", "for pancakes". Your crafts from such a dough will rise well when dried, and then crack. It is better to mix rye flour with wheat flour. Dough made with only rye flour will be hard and completely inelastic. Sift the dough before preparing.
Salt is also suitable for simple table salt. It is not necessary to take sea and iodized because large grains will not dissolve, the dough will eventually come out “speckled”. Take very cold water for the dough, do not pour a lot of liquid into the salt and flour at once, add 50 ml each and knead it thoroughly.
For sculpting small figures, wallpaper paste is added to the dough. It is diluted with warm water to the consistency of sour cream.
Dough Recipes
- For large figurines. We take 200 grams of flour and 200 grams of salt. Mix, add a little water (total amount 125 ml). By the way, to measure salt and flour with an ordinary glass, you need to know the trick: salt is heavier than flour, so 200 grams of flour is a glass, and the same amount of salt is half a glass. Add salt to flour immediately, before adding water, otherwise you will not be able to make salt dough for crafts correctly.
- For thin, small (embossed) figures. We take 300 grams of flour, 200 grams of salt, 2 tablespoons of dry wallpaper paste, mix. For a good mix, you can use a mixer. Add water little by little (total amount 150 ml). Instead of wallpaper paste, you can take one tablespoon of starch.
Mothers who pay a lot of attention to the development of a child often ask themselves the question: how to make salt dough for modeling? And the point here is not only that sculpting is useful. Do-it-yourself dough turns out to be completely safe, cheap and at the same time it is not nearly inferior to the purchased one. In addition, you can make it at any time when there is a mood to sculpt. It is prepared quickly from ingredients that are in every home.
Why sculpt with kids?
Salt dough modeling is an exciting activity for the whole family. Making figurines with your own hands is interesting for children of any age. You can already do modeling with one and a half year old kids, this activity will also appeal to preschoolers and younger students. Yes, and many adults will be pleased to remember their childhood and blind, for example, fly agaric or hippo. 
In addition to the fact that modeling from salt dough is interesting for children, it is also a useful activity. She develops:
- fine motor skills of the hands, which, in turn, stimulates early speech development;
- spatial thinking;
- creative thinking;
- color thinking;
- cognitive activity;
- Attention;
- memory;
- perseverance:
- movement coordination.
Modeling from dough at home gives the concept of colors, shapes, sizes, has a positive effect on the emotional state of children and, in general, has a beneficial effect on the development of the nervous system. Therefore, this lesson is recommended for hyperactive kids. 
For preschoolers and younger students, creating crafts from salt dough helps to acquire useful skills, such as:
- diligence;
- accuracy;
- the ability to fantasize;
- the ability to think and analyze independently;
- copying parts from a template;
- purposefulness.
For modeling to turn into a full-fledged developmental activity, it is not enough for parents to know the recipe for salt dough and cook it, and then watch the process from a distance. You need to deal with children: show, tell, guide, encourage. However, one should not demand too much from children at once, and one should not impose one's opinion on diverse issues on them.

How to cook salt dough?
To prepare salt dough at home, there is more than one recipe and several methods of kneading. To the classic ingredients - water, salt and flour - add starch, wallpaper paste, glitter, flavors. You can experiment if the modeling mass is prepared for children over 3 years old. Various additives improve its properties and the quality of finished crafts. However, for children of one and a half years it is better to cook the most common salt dough. To make it more interesting for kids to sculpt, you can add natural dyes to it.
To get colored salty dough, you need to add dye to the water before kneading or color it already ready. It is convenient to add dye to water in advance when a lot of mass of the same color is required. And if you need several small-sized balls of multi-colored dough, then it is better to add dye to the already prepared mass for modeling. As part of the test, which is prepared for children, you can use food colors or natural coloring agents (cocoa, beetroot and carrot juice, turmeric, etc.)
There are two ways to knead the dough:
- mix salt with flour and gradually add water;
- Dissolve salt in water and add flour.
The first method is used when the recipe contains an approximate amount of ingredients in shares. With this method, it is constantly necessary to control the density of the kneaded mass. And if you accidentally pour water, you will have to add a mixture of flour and salt again. This may take a long time.
You need to use the second method if the recipe contains the exact amount of ingredients by weight. It is enough to measure the required amount of flour, salt and water using a kitchen scale and knead the dough. Below will be given weight norms for all the necessary ingredients, from which a plastic mass for modeling is quickly prepared. It is easy and pleasant to sculpt from it - it does not stick to the hands and it turns out very similar to the store.

Recipe
To quickly prepare salt dough, you can use the following recipe. You will need:
- 150 g of premium wheat flour;
- 150 g non-iodized table salt "Extra", that is, fine grinding (you can grind ordinary salt in a coffee grinder);
- 100 g of cold water.

Please note: flour and salt are taken in equal masses, but their volumes are not equal!

To color the finished salty mass, you will need natural dyes:
- 3 tsp turmeric for yellow;
- 3 tsp cocoa for brown;
- 3 tsp raw beetroot juice for pink;
- 1.5 tsp salt (as a thickener for beetroot juice);
- 2.5 tsp flour (as a thickener for beetroot juice).
Proceed according to the following algorithm.


Storage conditions
The recipe for salt dough is quite simple and does not take much time to prepare, so it is not made for future use. There is another reason - the mass quickly winds up and becomes covered with a crust. Sculpting from it becomes impossible. But if the dough is still left after sculpting, it should be put in a plastic container with a tight-fitting lid or in a plastic bag and put in the refrigerator.
It is convenient to store colored dough in separate jars: for each color - its own. The main thing is that the lids close tightly. The jars remaining from under the purchased mass are perfect. In the refrigerator, properly packaged salt dough can last an average of about 10 days.
It is undesirable to leave the mass for modeling in the air for a long time during the creation of crafts. Let the dough be in a resealable container on the table. You should take a piece of the size that is currently needed. This is not a whim, but a recipe for storage. Also, this condition will allow you to maintain order in the workplace.
Crafting with colorful salt dough is a wonderful activity to help your child develop as they play. This is not boring exercises and tedious tasks, but a magical colorful fairy tale that every adult can tell to their child. Moreover, he now knows the recipe for modeling mass.
Plastic and accessible to everyone, the material allows you to create unique things for the interior. Salt dough has long been used to make beautiful crafts. From a pliable mass, together with a child, you can fashion figurines of animals, New Year's compositions and even whole thematic pictures.
Features of working with salt dough
Everyone can make crafts from this material - a small child who begins to practice the art of modeling, and an adult who has mastered the process in kindergarten. So that the molded product does not deteriorate, you need to do everything right - prepare the mass for modeling directly and dry the figures. Coloring also has its secrets, which you will definitely learn about.
- How to make salt dough for modeling
The consistency is easy to work with, but for a successful craft, you need the right kneading. If you correctly observe all the proportions indicated in the master classes, then you can make a pliable material. The figures made from it retain their original appearance. There are two popular salt dough recipes that are successfully practiced among homemade hand-made lovers.
Recipe #1
- wheat flour (WS) - 500 g;
- water (necessarily cold) - 200 ml;
- salt "Extra" - 200 g.
According to this recipe, the mass turns out to be of high quality, plastic and edible (which is important). All components of the material can be eaten, so it is great for working with young children during developmental activities. If a child eats a finished craft, then it will not cause harm to his own health. Products made from safe material are the best choice for a curious baby.
Recipe #2
Also suitable for sculpting with kids, because the consistency is plastic and you can sculpt anything you want. During the game, the child must be well monitored so that the mass is not eaten. For cooking, you need to stock up on the following ingredients:
- white flour of the highest grade - 500 g;
- water (cold) - 200 ml;
- PVA glue - 2 tbsp.
The adhesive component in the composition guarantees the stability of the product made from the mass. Such a composition is easy to tint and stain, and in addition, it has a long solidification period (it is easy to correct minor flaws in the finished craft). Try both recipes to find the best one for your own tasks (depending on age, skill, etc.).
- How to dry salt dough crafts

- an obligatory stage in the creation of crafts from salt dough, thanks to which products acquire strength. The drying process requires certain conditions, because at room temperature the figurine will not reach the desired condition, because in twenty-four hours it will dry out only one millimeter. In the summer you can try to put it in the air, but this will not give much results. It is best to use the oven:
- At a temperature of 75°C, the drying time will be an hour.
- At a temperature of 100 ° C - an hour.
- At a temperature of 120 ° C - half an hour.
- At a temperature of 150 ° C - half an hour.
Large items should take longer to dry, while smaller items can take less time to dry. To prevent the dough from sticking, the baking dish must be covered with foil. Decor in the form of beads, rhinestones, beads should be dried at a temperature not exceeding 120 ° C. Do not use a microwave oven or put crafts on a hot battery, otherwise they can instantly deform and crack. From time to time you need to turn the figures in the oven so that they are evenly baked on all sides.
- How to color dough products
The created and dried figurine can be painted in any of your favorite colors. The best choice for these purposes would be acrylic paint or gouache. The dyed product must be covered with colorless nail polish so that the paint lasts for a long time and does not lose its juiciness and brightness over time. You can make a colored mass by adding the desired tone (it is better to use food coloring) during flour kneading.

What can be done from salt dough with your own hands
Having mastered the technique of creating salty material for modeling, you can easily achieve mastery in which you can make crafts of any complexity. A new hobby may interest not only an adult, but also a child. Plastic dough is a wonderful material for creativity, the development of hand motor skills, concentration and much more. There are a lot of ideas on what can be made from modeling dough, while crafts can be of any complexity and are interesting for children of all ages.
Simple figurines for children 2-3 years old
Having plastic material at hand, you can organize a developmental activity for the youngest children. What can be molded from salt dough for a two-year-old baby? First, you should introduce the crumbs to the material - let them hold the mass in their hands, then clearly show what the dough is capable of, that is, make a bun or a snowman.
Small children are not capable of grandiose crafts, so it's best to start by following the easiest method and doing everything in stages:
- Roll out the dough with a rolling pin, and then press small objects in the form of figured pasta, beans or buttons onto the finished layer.
- Cut out the dough with cookie cutters.
- Roll balls of different sizes from plastic material, creating little men, a snowman, a bun, a smeshariki.
- Roll sausages, making snails, caterpillars and other elementary figures.

For children 3-4 years old
For children of three or four years old, one rolling is not enough, because the child has already grown up and can perform more complex tasks. Salt dough pictures will be an interesting idea for creative activities. On a piece of paper, the kid with the help of an adult will create a three-dimensional image, and then color it. Pictures can convey any plot: from the seasons and mini-images of the country to episodes of fairy tales and cartoons.

For modeling with children 5-6 years and older
If you don’t give intricate tasks to young children, then creative six-year-olds can master complex crafts from salt dough. For example, these can be figurines in the form of a voluminous sheep, a mouse on cheese, or an original vase with a chic bouquet of flowers. Children at the age of five or six can master the technique of manual work using a salty consistency. Following the example of an adult, a child can cope even with those products that require a significant concentration of attention and manual dexterity.

How to sculpt crafts from salt dough - step by step instructions
The process of sculpting crafts is easy, takes a certain amount of time, but gives a chance to pay attention to your baby. With easy instructions and a few video tutorials at hand, parents can quickly figure out how to make a particular salt dough craft and explain it to their child. There are many product options, choose one or more and get started!
Flowers
The created products will look not only beautiful, but also believable. For example, to make a rose, minimal effort is required:
- From the dough prepared in advance, roll out the layer (thickness is not more than half a centimeter).
- With a round object in the form of a glass, squeeze out five identical petal elements.
- Lay the circles horizontally on top of each other so that each component is in contact, protruding by a centimeter.
- Roll the steps into one roll, and then place the whole structure on one side on a hard table surface.
- Spread the petals of the bud on the top of the flower from the center in different directions.

Toys for the New Year
Original decorations are made easily and quickly. If you don’t know what can be made from salt dough for modeling for the New Year, consider hanging toys for the Christmas tree. For manufacturing, you will need salt dough, colored paints and wire for fastening:
- Bell. It is necessary to roll out the ball, make a bell-skirt. Attach the tongue to the wire, which will serve as a fastener on the branches of spruce or pine. Dry the finished figure, decorate in bright colors.
- Pendant figurines. Make a figure with a cookie cutter. Poke a hole in the top with a toothpick or cocktail tube. After drying, paint the toys, and thread a dense thread or thin ribbon through the hole.

Crafts for February 23
The best gift for a man is a symbolic gift that can emphasize valor, courage and strength. Thanks to special molds in the form of a tank, a soldier, a ship, you can easily make a gift for February 23rd. To do this, roll out the salt dough into a layer and squeeze the selected shapes out of it with a shape. It remains only to dry the souvenirs and paint them in military color.
Souvenirs for March 8
Flowers are the best gift for Women's Day. Why not make them from salt dough? From plastic material, you can create a bouquet that will delight with its beauty for many years. An excellent gift for a friend, mother, sister, grandmother will be a vase of flowers:
- Make a mass according to the classic recipe, roll out a half-centimeter layer, cut a 15x10 cm rectangle from a piece.
- At the top of the figure, create a hole with a cocktail tube. This will make it possible to hang the product on the wall.
- Form a ball from the other part of the dough, roll it out and make a vase, slightly bending the neck. Attach to the prepared rectangular base.
- Roll out three stems, attaching them to the vase.
- Cut out circles for the bud and twist to form a rose.
- Oval figures will serve as petals on which to make stripes.
- Decorate the vase with voluminous balls or chamomile.
- Dry the picture, paint it, and cover it with a layer of colorless varnish on top.