Ranetki - a variety of apples, they are small in weight, but very juicy and tasty. Such apple trees usually give a big harvest, which caring housewives try to put into action as soon as possible, that is, use it for winter harvesting. For such a case, our recipe for homemade ranetki wine is also suitable. Its preparation differs markedly from traditional grape wine recipes. The process is a little easier. But the finished product is not inferior in taste and bouquet to wine from grapes. Let's get acquainted with all the stages of self-production of wine from amazing apples.
How to choose raw materials
Autumn and winter varieties of apples are chosen for making wine - ranetki are the best fit. Other varieties that are good in taste for winemaking are antonovka, anise, slavyanka.
It is interesting that even from frozen apples of these varieties, you can make wine. However, it will not last long. It is recommended to use it young, that is, not older than six months from the day of clarification.
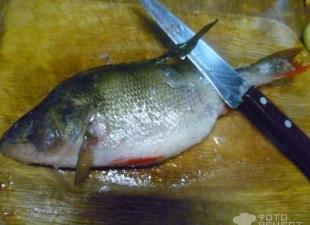
Choose small apples of ranetki only when they are ripe, without damage by worms or other pests. You can take carrion, but not the fruits that begin to rot. They can spoil both the taste of wine and its consistency. Then the fermentation process will turn into spoilage of raw materials.

What else is needed
Traditionally, to prepare homemade wine from ranetki, special wooden barrels were used. The recipes were simple, but for a large volume of containers, a lot of raw materials are also needed.
In home apartment conditions or in the country, it is more convenient to take glass bottles with a capacity of 10 or 20 liters for wine. Many winemakers take large glass jars (5 liters can be used), they are easy to carry and wash. The advantage of jars is a wide neck, it is convenient to pull apple pulp out of it.
A small amount of water is required. Use soft filtered water. The presence of chloride compounds in it is unacceptable.
Wine from apples at home is prepared without yeast.
Sugar is poured into apple pulp to activate the fermentation process of raw materials. Make sure it is of good quality and meets the following requirements:
- loose consistency;
- white color with a crystalline sheen;
- without smell.
Training
The recipe for wine from ranetki at home begins with the preparation of the main raw material - apples. They need to be washed in a basin of water.

Cut the pulp from each and chop it. You can take a blender or a meat grinder for this, an ordinary household food processor is also suitable. Further, a simple recipe for wine from ranetki involves straining apple pulp.
Straining the pulp
For such an operation, there is a special equipment made of wood. It resembles a wooden machine with a barrel. In fact, inside this barrel is pulp and juice for wine. The device is equipped with a valve that is able to increase the pressure inside the barrel. If you open the shutter at the bottom and tighten the valve, pure fruit juice, squeezed from the pulp, will flow from the lower guide. It remains only to substitute a container with sterile gauze - it is needed to re-strain the juice. It may contain particles of applesauce.

First step: mixing the ingredients
Calculate the total volume of the resulting pulp (the basis for wine from ranetki). Fill half the weight with filtered water. It is also necessary to introduce granulated sugar into the mixture. Its ratio: for every kilogram of apple pulp - 2 tablespoons of sand. Place all this in a glass container - a bottle or a jar.
Start of fermentation
Leave the resulting mixture in a warm place to activate the fermentation process. There should be no foreign pungent odors in the room, the relative air temperature should not be lower than 20 °C. Put on a sterile medical rubber glove for each container, fix it on the neck of the bottle with an elastic band or tape. When fermentation starts, it will inflate like a balloon and may fly off. After 3-4 days, the pulp should ferment. Open the bottle and strain the mass through sterile cheesecloth. It is better to fold it in several layers. At this stage, you will have pulp and juice.
Pour the juice into a clean and dry bottle. Use a plastic funnel. Place the pulp again in a glass container and fill with a second portion of filtered water. Ratio: for 1 kg of pulp - 1.5 liters of water.
It is very important not to fill containers with juice and pulp to the top! The liquid will begin to ferment, foam will form, which will rush up, then the entire fermentation unit will fly off the container.
Stir the pulp and cover again with a sterile rubber glove to keep air and dust out. Otherwise, instead of homemade wine, you will end up with a lot of apple cider vinegar. Place the container again in a warm place for fermentation.
Fermentation - second stage
When two or three days have passed, strain the juice from the re-fermentation and mix with the juice from the first run. Next, all this juice must be mixed with granulated sugar. From its quantity will depend on what kind of wine you get:
- semi-dry - it contains 400 g of sugar;
- sweet dessert - 600 g;
- sugary liqueur - 800 g.
But you should not enter the entire portion of sugar at once. Do this in two passes.
First entry:
- add half the indicated amount of sugar to apple juice;
- mix and install a fermenter (shunt).

A fermentation shunt is a special curving tube that is sterile inside. There should be water in its bend. The bubbles of gas, rising up, pass through the water and escape into the air. Such a system allows you to make homemade wine from ranetki in almost sterile conditions.
If you didn’t have a fermentation unit, buy a medical dropper tube from a pharmacy. It is relatively cheap and easy to use. The tube must be cut off from the side where the syringe is installed: it will not be needed. Insert the part of the dropper with the seal into the rubber glove attached to the bottle. Secure with tape to seal. Lower the second part of the tube into a small jar of clean water. Put it next to the bottle. The gas bubbles will rise up the tube and out into the water.
Another option for sealing the preparation of wine is a cambric (tube) and a special lid for a jar (bottle) with a hole for the tube.
Keep the bottles in a warm room at a temperature of 15-20 ° C for 5 to 10 days. This time depends on the amount of must. The more it is, the longer it ferments.
Second entry:
- when the gas bubbles stop rising, drain some of the wort - 200-300 ml is enough;
- dissolve the second part of the sugar in this amount and drain back, chat the liquid a little;
- put back in heat to complete fermentation - it lasts from 2 to 3 weeks.
Completion of wine fermentation
After the specified time, using the same tubular hose, pour the wine into the bottle. To do this, bring the end of the tube from the can of water into the bottle and place it just below the wine container.
The wine will drain, bypassing the risen pulp. Now your task is to prevent sediment from the bottom of the container from getting into the tube.
From the first reading, you might think that everything is very complicated. In fact, homemade ranetki wine is a simple recipe and does not require much effort, only time.
The bottle of resulting wine should be put back to ferment with a shunt or a new clean dripper setup. As soon as the release of carbon dioxide is over, the young wine from ranetki is ready - you can already drink it. It will be a little cloudy, but taste good. Its aroma alone stimulates the appetite and desire to try it as an aperitif before dinner.
Wine from ranetki at home is original if you add a little cinnamon or any other spice you like to the bottle of the finished drink. But enter an additional component immediately before use or a few hours before it.

Lightening
To acquire the best taste and aromatic qualities, it needs to be clarified. Keep the bottles in a dark, cool place for 2-3 weeks. During this time, a stable sediment forms at the bottom. Drain the wine into clean and dry bottles. Seal with stoppers.
If you want to drink the wine young, corks can be plastic - they do not allow the drink to breathe. But this is not necessary if the storage will be short-lived. But aged wine is corked only with high-quality corks made from special tree bark. This blockage allows the wine to breathe. At the same time, no oxygen enters the bottle.
Such a wine will be almost transparent, with a golden amber hue, without sediment.
wine aging

Wine aging depends on many factors, among them - the variety of fruits (raw materials), the correct preparation and some others. The best wines are stored on the shelves of the cellars for several years. Young wines can be stored for six months, then they get older.
At the same time, special wine shelves are arranged in the cellars, on which the bottles are laid out in a supine state. This is how it matures and matures.
The strength of apple wine usually does not exceed 16-18 ° C. Basically because of this, such drinks are considered dessert and light liqueurs.
During several years of wine aging, a little sediment forms at the bottom of the bottle. This is absolutely normal. Just carefully pour the wine into a glass, trying not to touch the sedimentary haze.
The wine is used, as it is stored, in a cool form.
Home winemaking involves the preparation of weak alcoholic beverages from most berries and fruits growing in the garden. This is a simple process, but it has some secrets depending on the raw materials used. Is it possible to make wine from ranetki, what is its taste and shelf life?
Ingredients
Apples 2 kilograms Water 1 liter Sugar 400 grams
- Servings: 4
- Time for preparing: 1 minute
How to make wine from ranetki
Wine from small beautiful apples - ranetok is very different from any other wine product. It has aristocratic tartness, slight sourness and amazing aroma. How to make wine from ranetki at home? Before grinding, small ranetki are sorted out, damaged areas are cut out, and they are freed from seeds and core. Then they are passed through a meat grinder or juicer to obtain a thin applesauce.
It is stirred, add about one liter of cold boiled water per 2 liters of puree (less if juice is enough). The mixture is placed in a wide dish, covered with gauze and left at room temperature for 3 days. Every day it is stirred with a wooden spoon 2-3 times.
Next comes the process of adding sugar. For 1 liter of wort, you can add from 200 to 400 grams of sugar, depending on your wishes. The more sugar, the sweeter and stronger the wine will be. A simple recipe for homemade ranetki wine involves the use of an ordinary rubber glove, which is put on the neck of the must bottle and firmly fixed on it. Experienced winemakers prefer to use a water seal.
The fermentation time of the must is about 4 weeks. When the glove deflates or the water seal stops gurgling, the young wine can be filtered, poured into glass containers and left to age for several months. With proper fermentation, the shelf life of wine is almost unlimited.
Secrets of home winemaking
In order for the wine to turn out delicious, not to give off a vinegar smell, to be clean and transparent, you need to know some of the nuances of cooking.
1. Do not wash apples, you can only clean them of visible dirt with a dry cloth;
2. Maintain the correct temperature regime - ideally it is 20-23 degrees;
3. Wait for the final stage of fermentation, do not rush to bottle the wine product.
4. Young wine from ranetki almost always turns out to be tart, therefore, in order to acquire a pleasant sweet and sour taste and greater transparency, bottled wine is left to mature in the cellar for at least 3 months.
5. Careful filtration through cotton wool helps to make the product transparent.
Ranetok wine has a beautiful pinkish hue, which distinguishes it from other apple wines. A person who has never tasted it will not be able to guess the product from which the wine is made. This is one of his secrets.
Ranetka is a special variety of apples, characterized by resistance to any climatic conditions, high yield and medium-sized fruits. This is a hybrid of Siberian berry and plum-leaved apple trees.
It is from apples of this variety that an excellent wine is obtained with a low strength and a delicate taste.
This wine is easy to prepare does not require serious financial costs, it can easily be prepared at home.
In almost all recipes for such a drink use three main components:
- Apple juice.
- Water.
- Sugar.
Other ingredients are added as desired or according to the recipe.
In the manufacture of this, a very important role is played by the container, which is used for fermentation. It should be a glass container with a wide neck. The container must be hermetically sealed, only in this way the fermentation process will proceed correctly.
Any non-toxic product can be used for sealing:
- Paraffin.
- Plasticine.
- Construction sealant.
Also here it is important to have a tube for venting gas. It must be attached to the lid.

Its other end is lowered into a glass of water so that the fermentation products (gases) can freely exit the container. It is also necessary to monitor the fermentation process. If the gases stop coming out, then the fermentation is over. But that's not all.
In order to make sure that the process is complete, pour the wine into a glass bottle and leave it at room temperature for 14 days:
- If the drink does not become cloudy, then the fermentation has stopped and the wine is completely ready.
- If not, then you should add a little yeast to the drink and put it under the water seal again for another 2 weeks.
Now all the prepared drink can be bottled and subjected to aging for 6 months. It is best to keep such wine in the cellar and not expose it to temperature changes, as this negatively affects the quality of the product.
Wine can be aged longer, for example, a year or a year and a half, from which its taste will become even more saturated and bright.
Attention! A sign of mature homemade wine is transparency without precipitation and the presence of protein particles (flakes).
Easy step by step recipe
Fruit preparation
Preparation of raw materials is the first and most important stage. Here it is important to preserve the natural yeast film of apples in order for the fermentation to proceed correctly, because the quality of the drink depends on it.

Whole apples should be picked directly from the branches, while rotten or budded fruits should be discarded, they are not good. Apples with damaged skins are also not suitable.
If you use fallen apples, then they should be carefully sorted out, washed, and cores and tails removed.
Attention! If the blocks have been plucked from the branches, they should not be washed so as not to wash off the natural yeast coating.
Getting juice
So the fruits are prepared, now you can start making juice (wort):
- To do this, the crushed ranetki are passed through a meat grinder or juicer, and the resulting juice is placed in an enameled container along with the pulp (pulp).
- The juice is diluted with water in the proportion of 1 part water and 2 parts juice.
- The container is covered with 3-4 layers of clean gauze in order to ensure normal ventilation of the wort and at the same time prevent debris from entering.
- After 12 hours, the fermentation process begins.
Reference! Pulp is a slurry of crushed fruits, peel, seeds. In other words, this is the original pulp, which serves as the basis for the fermentation of wine must.
Preparation of wine preparation
In order to obtain a wine preparation, it is necessary to keep the prepared mixture (must) at a temperature of at least 25 degrees for 3-4 days. She should ferment well.

The must ferments, the pulp separates from the juice and rises to the surface of the container.
At this stage, you should stir the wort 2-3 times a day. At the same time, the pulp is heated to prevent the drink from souring.
Sign of wort readiness:
- characteristic odor with a pronounced alcohol tint,
- the liquid will separate from the pulp, hisses, foams, becomes cloudy.
If all these signs are present, fermentation is proceeding normally. If the signs of fermentation are weak, this indicates a lack of natural yeast, they should be added additionally. To do this, 5 g of wine yeast is diluted in a small amount of water and simply added to the must.
At this stage, the juice is separated from the pulp. To do this, you can use a special press or a dense fabric folded in several layers. Then it is poured into a glass bottle.

Then add half the portion of sugar sugar and close the bottle with a water seal. It prevents air from entering and turning the wine into vinegar (souring). A week after the start of fermentation, the remaining sugar is added to the wine.
Now the future drink will stand for about 2-3 months.
If there is no water seal, a rubber glove can be put on the neck of the bottle, in which one finger is pierced with a needle.
Attention! The more sugar in the drink, the stronger it will be.
We remove the sediment
This stage is started only after the end of fermentation.
Characteristic signs:
- shutdown of the hydraulic lock,
- the formation of sediment at the bottom of the bottle,
- the wine becomes lighter and more transparent.
Now it can be carefully drained so that the sediment remains at the bottom. In this case, a thin silicone hose is used.

After the drink is drained from the sediment, it is tasted and, if necessary, sugar is added. At this point, the wine is considered young and requires maturation for 3–6 months.
During this period, the wine will have to be decanted (drained from the sediment) several more times to get the perfect transparent drink.
maturation process
The maturation process usually takes place in a cellar. To do this, the wine is poured into glass bottles, corked tightly and sent to the cellar. If there is no cellar, then a refrigerator is quite suitable.
The main condition is a dark and cool place. The bottles in which it will be stored should also be made of dark glass.
Usually the ripening process of apple wine lasts at least 6 months. This time is enough for the drink to acquire a characteristic taste, aroma and richness. If you plan to age the wine longer, it is advisable to pasteurize it.
This process is considered the final in winemaking, after its completion the drink is considered ready and it can be served at the table.
Attention! Experienced winemakers advise adding wine yeast to the drink only as a last resort. By itself, apple juice has the ability to ferment on its own, thanks to the presence of yeast on the apple peel.
The video describes in detail how to make ranetki wine at home:
Cider with mint
This cider will have a delicate and refreshing taste.
What you need:
- Ranetki apples - 7 kg.
- Sugar - 4 kg.
- Wine or live yeast - 100 g.
- Pure water (preferably spring) - 4 liters.
- Fresh mint leaves.
- Wine yeast (add as needed).
Cooking:
- Make apple juice or puree (as described above).
- Dilute the yeast with warm water until completely dissolved.
- Combine applesauce (juice), diluted yeast and sugar, mix.
- Place the prepared mass in a clean enameled container, cover with gauze and leave to ferment in a warm place for about 4 weeks.
- Now the future wine should be filtered several times so that there is no sediment and poured into glass bottles. At this point, mint leaves are added.
- In this state, the drink is stored for at least 6 months, and only after that it will be ready for use.
Attention! This version of cider is perfect for making various cocktails and for use as an independent product.
Another way to make apple cider at home is described in the video:
With chokeberry and without yeast
Homemade wine made from apples and chokeberries can truly be called a unique and unusual drink. It has a tart taste and a bright dark red or ruby color. In addition, it has medicinal properties.
You will need:
- 2 kg of chokeberry.
- 15 kg of apples.
- 1 liter of water.
- 200 g of sugar per 1 liter of juice.
Cooking:
- Wash apples and mountain ash thoroughly, grind them separately, then mix the resulting pulp. After that, half the dosage of sugar is added and mixed, covered with gauze and left to ferment in a warm place for 2-3 days. The wort is stirred daily (at the same time, the hat is heated).
- After 2-3 days, the juice is separated from the pulp (pulp) and poured into a clean glass bottle. At this stage, the second half of the sugar is added and the wine is left to mature. In this case, the bottle should be closed with a water seal and put a gas outlet tube.
- In this state, the wine should remain for about a month. The temperature in the room where the drink is ripening should not fall below 24-25 degrees.
- After a month, the wine is carefully drained from the sediment and left for another 3 months for additional fermentation (fermentation). After that, the drink can be bottled and sent for storage in the cellar. Such a product can be stored for up to 2 years, becoming even more tart and tasty.
The video describes how to make homemade wine from chokeberries and apples:
Classic way
Ingredients:
- Prepared ranetki - 5 kg.
- Sugar - 3-3.5 kg.
- Water (preferably spring) - 4 liters.
Cooking:
- Apples are crushed in a meat grinder or juicer, you can also use a blender.
- Puree is spread in an enameled container and left for 3 days in a warm place (temperature 25–28 degrees).
- After about a day, add the entire portion of sugar according to the recipe.
- After 3 days after the start of fermentation, the pulp should be removed, and the liquid itself should be poured into a glass container and closed with a water seal. In this form, the wine preparation is kept for 3-4 months.
This wine will have a bright apple aroma and delicate taste.

In order for the wine to become perfectly transparent, it should be last 6 to 8 months. This will allow the sediment to finally settle.
With orange peel
Ingredients:
- Ranetki apples - 5 kg.
- Pure water - 3 liters.
- Sugar - 3-4 kg, depending on how strong the drink you want to get.
- Dark raisins - 150-200 g.
- Orange peel - 1 kg.
Cooking:
- Grind apples-ranetki to a state of puree.
- Dissolve sugar in warm water and combine with the apple mass.
- Place it all in a saucepan.
- Add raisins (it enhances the fermentation process).
- Keep the resulting mixture in a warm place for three days.
- Add crushed orange zest.
- Pour into bottles, install water seals.
- Leave in a warm and dark place at a temperature of 25 degrees for a month.
- Then drain from the sediment and pour into glass bottles.
- Keep refrigerated for at least 3-4 months.
You should be aware that a drink with orange peel will not be completely transparent.

The taste will be tart-bitter with rich citrus notes.
Attention! Only the zest (skin) of the orange should be added to the wine, not the pulp itself. It has the ability to suppress the vital activity of yeast and inhibits the fermentation process.
Useful properties of the drink
As strange as it may sound when it comes to alcohol, but ranetki wine is very healthy. And in some cases it is even recommended. Its benefits are beyond doubt if you use the drink correctly and knowing the measure.
What is the benefit:
- Such a drink is very rich in micro and macro vitamins. It contains: iodine, pectins, fiber, iron
- This is a low-calorie drink, it contains practically no fats and proteins.
- It improves digestion, activates the digestive tract.
- Helps cleanse blood vessels, stabilizes blood pressure (blood pressure).
- It has a positive effect on blood-forming processes in the body.
- Helps normalize blood sugar.
- The drink improves metabolism and metabolism, removes toxins.
- Moderate drinking of wine has a beneficial effect on the functioning of the thyroid gland, and also helps to strengthen teeth and gums.
Ranetok wine is an excellent antidepressant that has a beneficial effect on the nervous system, helps relieve anxiety, fatigue, irritation and tension.

How best to use?
Wine made from ranetka apples is perfect for fish and low-fat meat dishes, as well as for light desserts. I also use it as an aperitif because of the lightness of the fortress.
However, it should be remembered that this is still wine, not apple juice, and use it responsibly. This is an alcoholic drink, which means you need to follow the measure in use so as not to harm your health.
There are also a number of contraindications for the use of such wine:
- Allergy or individual intolerance to the components of the drink.
- Acute and chronic diseases of the gastrointestinal tract, constipation.
- Hepatitis and other liver diseases.
- Diseases of the cardiovascular system.
- Kidney diseases.
- Problems with the gallbladder.
- Alcoholism.
Homemade ranetki wine is not just apple wine, it is an independent drink that is different from any other.

This wine is distinguished by its delicate taste and some aristocracy. It has a slight sourness, and a delicate aroma, and astringency.
And if additional ingredients were used in the preparation (grass fruits or berries), then your drink will become truly unique.
In summer cottages in garden plots, and simply in plantings, a huge number of ranetki grow. These apples in miniature cover the whole tree, ranetka is a very prolific plant, several buckets of fruits can be collected from one tree. And they use the ranetka very rarely and only birds feed on it all winter. But in order not to lose a large harvest, various compotes, jam, and jam are prepared from them. Increasingly, ranetki are used to make wine at home.
Homemade wine from ranetki is fragrant with a pleasant sour-tart taste, very beautiful color. To prepare the recipe, you will need the fruits themselves, sugar and water. Homemade ranetki wine is a good antioxidant, it contains useful vitamins and acids. A small amount of homemade wine will relieve fatigue and stress, cheer you up. There are a huge number of ranetok varieties, there are those that ripen in the middle of summer, there are late varieties. It is necessary to collect fruits as they ripen.
Classic wine recipe from ranetok juice
Ingredients:

Cooking:

Video recipe for making wine:
Wine recipe with ranet and mint
Ingredients
- Medium ranetki -5 kg;
- Water - 9 l;
- Sugar - 2 kg;
- Dry yeast - 20 gr;
- Lemon - 4 pcs;
- Mint to taste.
How to cook:
- Ranetki sort out the garbage, remove, rinse, remove the cores together with cuttings. Scroll in a meat grinder or make juice in a juicer.
- In a large saucepan, mix the grated mass of ranetki with water. Leave for 3-4 days in a warm place.
- Drain the juice into a container for fermentation, squeeze the pulp. Add lemon juice, granulated sugar, mint and yeast. It is desirable to use wine cultural yeast in the recipe. Close under the water seal and leave warm for 1-2 weeks. Pour the wine without touching the sediment.
- Strain the wine through a gauze filter and bottle. Close tightly and keep for about 2-3 months in the basement or cellar.
Wine from ranetki and chokeberry
 Very tasty homemade wine is obtained from the juice of ranetki and chokeberry. It is easy to prepare at home. Aronia fruits give the wine astringency and bright ruby color. Even chokeberry is a very useful berry, so the wine from it has a healing effect.
Compound:
- Chokeberry - 2 kg;
- Ranetki or apples - 15 kg;
- Water - 1l;
- Wine yeast - 5-10g;
- Sugar - 100-200 grams per liter of juice.
How to do:
- Wash apples and chokeberry. Grind apples in any way possible. Mash chokeberry berries. Mix the juice of mountain ash and apples in a saucepan, add yeast and sugar to half a portion. Cover the neck with a cloth. Leave to ferment for 2-3 days, stirring occasionally and drowning the hat.
- Separate the juice from the pulp, pour into a clean bottle, add the rest of the sugar. Close with a water seal and leave to ferment in a warm 20-25 °. After a week, you can add another 50-100 grams of sugar per liter if desired, such a wine will be stronger. Fermentation lasts 3-4 weeks.
- Drain the young wine from the sediment, pour into a clean container for further fermentation, which lasts another 1-3 months. Pour the finished wine from chokeberry with ranetki into bottles for storage. You need to keep it in a cool place, then the wine can last up to 2 years.
Small tasty apples, called ranetki, can be found in almost every household plot. As a rule, ranetki give a plentiful early harvest, it can be used to make incredibly tasty ranetki wine, the recipe of which is very simple - you only need water, sugar and fragrant small-fruited apples. This homemade alcoholic drink has a bright tart taste with a slight elusive sourness, and its amazing color resembles the delicate colors of the dawn emerging at dawn. The abundance of the ranetki harvest will help you stock up on homemade wine not only for your own use, but also provide this wonderful drink to all your friends.
Obtained by breeding, ranetki are able to withstand even significant frosts, they are unpretentious to the soil and growing conditions. The fruits of ranetki are both small - weighing up to 10-20 grams, and large, when the weight of an apple fluctuates between 25 - 40 grams. Ranetki take root perfectly in the regions of Siberia, the Urals, they grow even in Yakutia, annually delighting local residents with abundant fruiting.
As Siberians assure, it is enough to eat only one apple of ranetki to provide the body with vitamins for the whole day. The tart, sour fruits of ranetki are extremely rich in valuable nutrients.
Wine from these apples inhibits the development of pathogenic bacteria, it is useful for colds, helps to normalize metabolism, and removes harmful decay products from the human body.
Homemade wine made from ranetki is especially valuable because it helps to lower cholesterol levels in the body.
Tasty and healthy wine made from ranetki is a guarantee of Siberian health!
To prepare a homemade alcoholic drink from ranetki, we need the following set of products:
- apples - 2 kilograms,
- granulated sugar - 2.5 kilograms
- water - 6 liters.
The necessary equipment is a glass container and, to choose from, a device for obtaining juice from berry raw materials: a juicer, an extraction press or a good grater.
Let's get started!
1. Preparation of fruit raw materials
The crop of apples harvested from the tree is not washed, but sorted out, cleared of leaves and twigs. If you have collected fruits that have already fallen, they should not be washed either, just clean the dirt with a brush or napkin. If there are damaged areas on the apples, they should be removed. We cut the sorted apples into halves and cut out the apple core, which we discard.
2. Getting juice
Now we extract the juice from the obtained fruit raw materials. The process of obtaining it depends on the tools that you have: a food processor, juicer, meat grinder or a regular grater. A modern juicer or food processor will allow you to get juice with little or no pulp, in all other cases, one or another amount of applesauce inevitably gets into the drink.
What we do at this stage:
- in any specified way, grind apples into fruit puree;
- put the puree in a low wide saucepan;
- close with clean gauze or a linen towel;
- leave for 3 days, during which fermentation processes will take place in the liquid.
It is these processes that cause the entire fruit mass to delaminate into juice and pulp. The pulp is collected from above, so the liquid should be mixed several times, achieving a uniform consistency. By the end of the third day, the pulp that has gathered on top takes the form of a dense crust, which means that it is time to remove it. The juice remaining in the pot will have a pronounced alcohol smell, which is an accurate symbol that we are on the right track.
Now we need to add granulated sugar to the wine blank. If we take a full glass of sugar per liter of wine, we get an alcoholic drink with a strength of about 13 degrees. If you want to make wine of a lower strength, then less sugar should be added. If you are a fan of dessert wines, then you will need to add sugar in an amount of about 400 grams per liter of drink.

3. Preparation of wine preparation
After we have prepared the wine material, we must place it in a dry and clean glass bottle, which we fill no more than up to the shoulders. This free volume is left for the foam released during the fermentation process.
Thereafter:
- we hermetically seal the vessel with the help of a water seal - a special plug that has a tap for the escaping gas in the form of a thin tube;
- we place the sealed container in any dark place with an air temperature close to room temperature;
- we place the free end of the tube in a jar of water, it will act as an indicator of the intensity of the fermentation process.
We leave the bottle with wine material for a period of about three weeks, we observe the ongoing processes by the bubbles of carbon dioxide released from the tube. As soon as the release of gas bubbles stops, it means that the fermentation processes in homemade wine have also ended.
4. Drain the wine from the ranetki from the sediment
Some fruit pulp must be removed. To do this, very carefully pour the wine from one container to another, so as not to stir up the sediment that has settled to the bottom. If you use a thin hose to remove the wine from the sediment, this can be done without difficulty.

5. Young wine must mature!
Now we need to bring the homemade alcoholic masterpiece to condition. To do this, we cork it again and place it in a dark, cool place for 3 months. After this period, your chrysalis will turn into a beautiful butterfly, i.e. homemade wine made from ranetok juice will acquire a refreshing fruity taste and a bright rich aroma. Now this drink should be bottled and sent for long-term storage in a cool place.
Video of making wine from ranetki