And how to save money, but do it all for a promotion! Yes, they now have a promotion - Glazing for half the price, insulation for free, and I'm for full business, so sorry!
Balcony glazing, how to save on it?Yes, very tasty minced pork cutlets.
Features of the dish Minced pork cutlets are distinguished not only by their excellent taste, but also by their high nutritional value. The main part of the composition of minced pork is represented by proteins - 83.37%. In terms of calories, minced pork cutlets are higher than their counterparts from minced chicken and minced pork, while the proteins contained in pork are well absorbed by the body. The stereotype that pork dishes make you fat is fundamentally wrong. Of course, fried pork cutlets do not belong to the diet menu, but when consumed without fanaticism, they will not hit either the figure or the liver. The benefit in this case outweighs the harm. Therefore, delicious and ruddy beauties minced pork cutlets are the perfect solution for a tasty and nutritious breakfast and hearty lunch. From minced pork, you can step by step make not only classic cutlets, but snowdrift cutlets, and meatballs in sauce. Well, the most delicious minced meat is obtained from pork neck and shoulder blades.
Pork cutlets: recipes and cooking secretsGreat chicken cutlet recipe
Ingredients
Chicken mince 0.5 kg
White bread 3 slices
Milk or cream 150 ml
Onion 1 pc. Eggs 1 pc.
Salt to taste
Pepper to taste
Breadcrumbs to taste
To cook 6-8 medium cutlets, that is, to feed 3-4 people for dinner, you will need a pound of minced chicken.
You can cook it yourself or, if you know a trusted store, use ready-made minced meat. For the indicated amount of meat, you additionally need to use 3 slices of white bread, soaking it in milk or cream and squeezing it well before adding it to the minced meat. You can choose to add either 1 chopped medium onion or 2 cloves of garlic to the minced meat. For a pound of minced chicken, 1 egg is enough to form cutlets. Finally, don't forget to season the meat with spices like salt and pepper. Chicken cutlets are easiest to form between the palms of your hands. This should be done after you have thoroughly mixed the minced meat and turned on the pan with oil to heat it up. Formed cutlets on all sides need to be sprinkled with breadcrumbs (if you cook them in a double boiler - this is optional, you can just put them on foil) and laid out in a pan. Cooking time is about 6-8 minutes on each side. Turning the cutlets over to the other side, you can cover the pan with a lid so that they fry better.
Perfect Chicken Cutlets: Cooking SecretsProbably everyone knows about sinabon buns, but I think not everyone knows about their very interesting history of creation.
History of the Cinnabon
The most influential business publication Expansion Magazine (Mexico) believes that Cinnabon is not just a cinnamon roll.
The editors included it in the list of 50 pleasures of life. What's to blame? Hot aromatic dough, caramel sauce, pecans?
Most likely, both that, and another, and the third! The recipe for Sinabon cinnamon buns is kept in the strictest secret of the workers, and the best technologists worked on its creation. It was many years ago in America in the state of Washington under the auspices of Ritch Komen and his son Greg.
The secret of taste is in the patented recipe. First, wheat dough is high in gluten. Secondly, Makara cinnamon, grown in Indonesia at an altitude of five thousand meters above sea level. Third, strict production standards. The roll, which the master twists and then cuts into buns, should have no more than five turns. The company's calling card is the classic Sinabon with cream cheese and cinnamon. Each Cinnabon product is baked in front of customers and served hot straight from the oven. At first glance, there are so many nuances that I want to ask the question of how to cook Sinabon buns at home. Can this taste be obtained without special cinnamon? We managed to reveal the cards, read on for our recipes for Sinabon buns!
Pantone color palette on eggs
Graphic designers will not be able to resist such eggs. Instruction.
Black and white Easter eggs
 Easter eggs do not have to be decorated in bright colors. Black and white drawings are also interesting, which are easy to depict. Instruction.
Easter eggs dyed with silk tie
 Old 100% silk ties, scarves or blouses can also be used to color boiled eggs. Non-toxic and original! Instruction.
Super Mario Bros
 Great Easter theme for old school gamers. Instruction.
Chalkboard on eggs
This is a version of the miniature blackboard. These eggs can be personalized or you can write Easter greetings on them using chalk. Instruction.
Temporary tattooed eggs
 Source: brit.co
An affordable and simple idea for creating unique patterns on eggs. Instruction.
Washi Tape Ornament
If you do not want to get dirty with paints, then this idea is for you. You will need some washi tape (decorative Japanese ribbon made from natural fibers) and scissors. Instruction.
These stylish eggs are tempting to give French names like Pierre or Jean-Claude. Instruction.
dinosaur eggs
Another simple coloring technique that produces impressive results. It is enough to dip the eggs in the dye overnight for the color pigments to seep through the peel and form an amazing effect. Instruction.
Painting eggs with paper towels
Dip paper towels in your favorite food coloring, then wrap them around the eggs. After a few hours, the colors, along with the pattern of the towels, will be redrawn. Instruction.
Easter egg garden
 To make Easter eggs look like a garden, you will need dye and a few strips of origami paper. Instruction.
Easter eggs with old fashioned silhouettes
 With minimal effort, you can make eggs look so elegant and charming. Instruction.
golden globe
 You can decorate eggs with gold leaf in different ways, we liked the world map. Instruction.
Easter eggs with thumbprints
 Both adults and children can take part in the implementation of this charming idea. Add a couple of strokes and your prints can be anything! Instruction.
Watercolor Easter eggs
 To make an Easter masterpiece, just dip the brush into the paint and press it against the egg. Instruction.
Easter eggs on the theme "Doctor Who"
 For those who like the idea of time travel and for fans of the cult series. Instruction.
Paper napkin decorations
 No time and artistic ability? Take advantage of this idea! Just pick up paper napkins with a beautiful pattern, and voila! Instruction.
Lego mini
 Great idea for Lego fans. Instruction.
Easter eggs glowing in the dark
 Perhaps the most amazing, almost space eggs! Instruction.
Easter eggs dyed with fabric
 Wrapping the eggs in textured cloth before dyeing them will leave an intricate pattern on the skin that looks like painstaking hand painting. Instruction.
Embroidered Easter eggs
 Let's not lie, embroidering on eggs is not an easy task, but when you do it, you will get a one-of-a-kind attribute of Easter decor that you can use from year to year. Instruction.
Ombre coloring
 Ombre in French means "shading". This method of staining involves applying several shades of color with smooth transitions and gives a fabulous result. Instruction.
Staining with onion peel and plant leaves
 Pretty natural patterns are obtained by a completely non-toxic method. You will need sprigs of herbs, onion peel and old tights. Instruction.
Painted paint with nail polish
 This is a way to achieve a marbling effect using leftover nail polishes. Instruction
I've been wanting to collect this collection of Easter stuff for a long time. Indeed, in addition to painting eggs, there are so many more interesting activities that you can do with your children on the eve of the great holiday of the Resurrection of Christ.
1. Chickens made from wooden ice cream sticks. You can watch the master class at Crafty Morning.
2. Easter wreath on the door with colored eggs made of threads. You can see the master class at Wine and Glue.

3. Postcards with a bunny and chicks from fingerprints. You can watch the master class at Sarahndipities.

4. Fun packaging for Easter gifts. You can see the master class on Desing Mom.

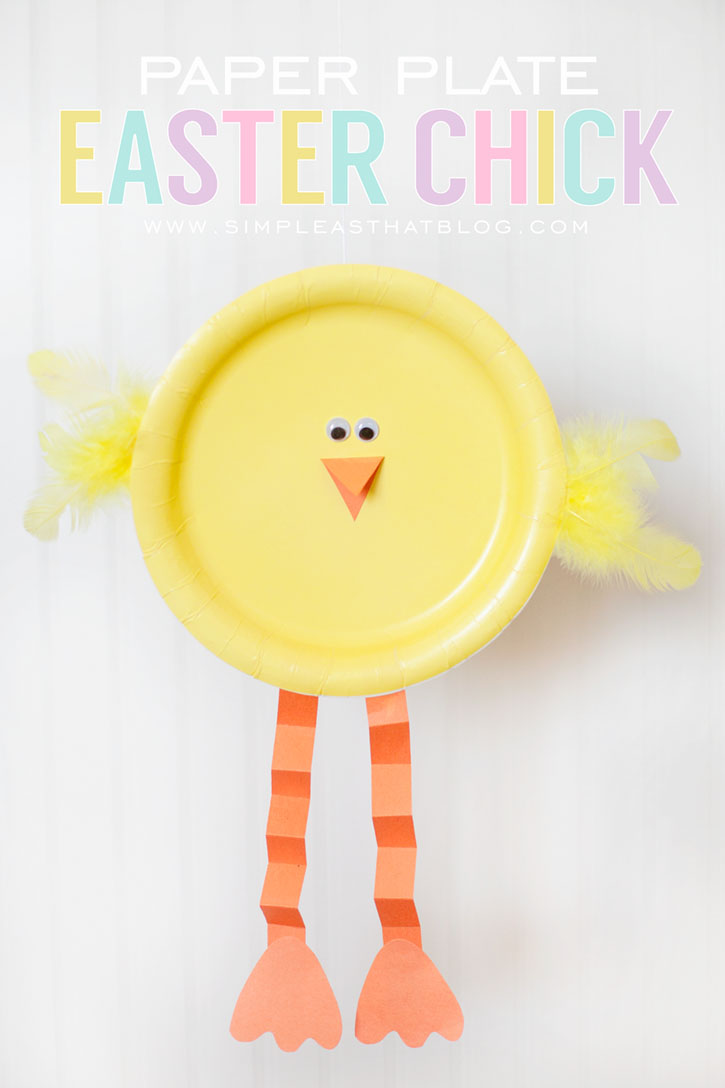
5. Cute chicken from a paper plate. You can watch the master class on Simple As That.

7. You can also download creative Easter coloring pages there.

8. Large cardboard bright spring and quite Easter birds. You can watch the master class on Krokotak.

9. Easter cards with simple birds and eggs for the little ones. You can watch the master class on Krokotak.
10. Drawn postcard with step by step instructions. You can watch the master class on Krokotak.

11. Simple chickens made with a stamp from a cork lid. You can watch the master class at Crafty Morning.


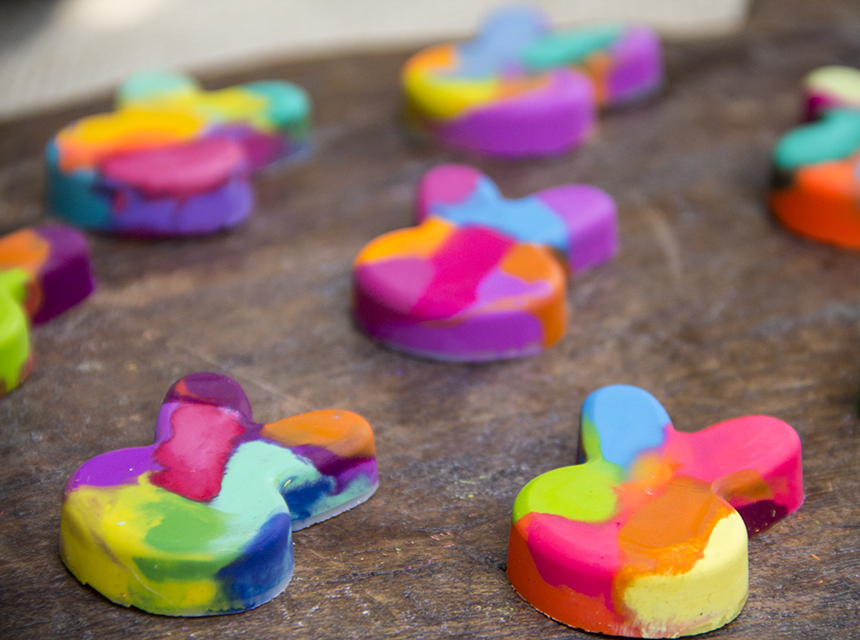
14. Easter wax crayons in the form of rabbits. You can see the master class on Moonfrye.
15. Mega-coloring "Easter egg". You can download it at MrPrintables.

16. Mega story “Easter cake”. You can download it on Sibmama.

17. Let me remind you about our Easter coloring poster. You can download it at ;)


19. Emoji style eggs. You can watch the master class at Studio DIY!


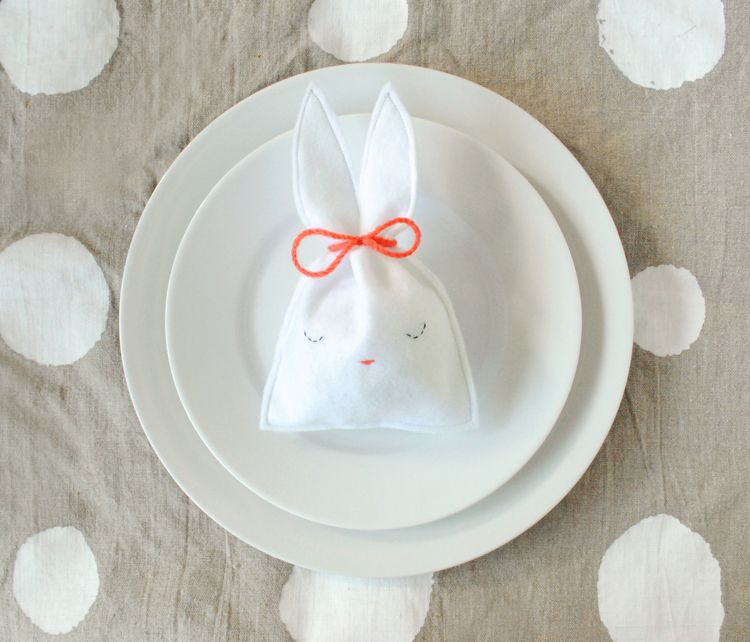
23. Fun simple felt bunny bags. You can view the master class on Mermagblog.
24. Large cotton bags for Easter gifts. You can view the master class on Mermagblog.

25. Cardboard angel wings for home theatre, Easter photoshoot or just for beauty. You can view the master class on Mermagblog.

26. Painting from paper ribbons. You can watch the master class on Minted.


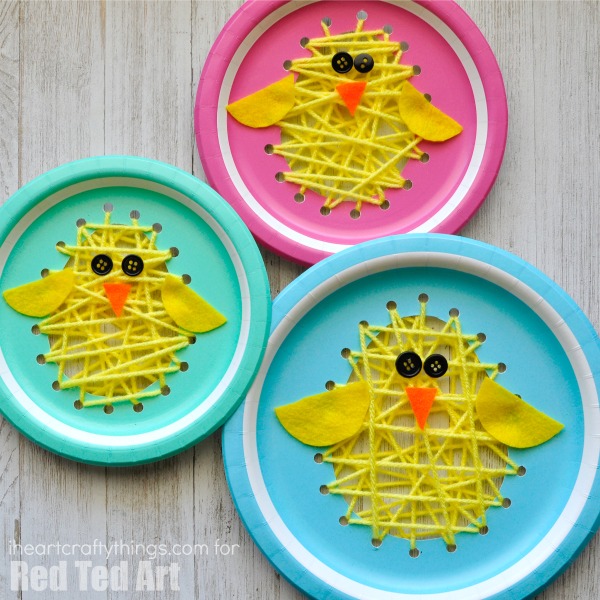
30. Super creative paper plate lacing. You can see the master class at Red Ted Art.
31. Cute bunny bookmark. You can download the template at Hello, Wonderful!

32. Potato stamps in the form of Easter eggs. You can watch the master class at Crafty Morning.


34. Easter eggs made of paper, painted with pom-pom dies. Preschool Activities.


37. Picture from buttons. You can see the master class on Crrieelle.

38. Volumetric paper pendants in the form of chickens. You can see the master class at Red Ted Art.


40. Easter finger theater. You can view the master class at
The whole family gathers at the Easter table. This is a bright and joyful day. An integral part of the traditions and entourage of this holiday are Easter eggs, all kinds of "krashenka" and "pysanky". Notes of a layman offers to expand the horizons of fantasy, and instead of the usual staining, experiment with various materials and techniques. As a result, you will receive original decorative ornaments and a lot of positive emotions.
You will be interested to read:
Easter Egg Coloring: Marble and Silk Patterns
"Marble" Easter eggs
Synthetic dye is more suitable for this coloring method, so it is better to clean the inside of the eggs. Pierce small holes in the top and bottom of the shell, then pierce the yolk and carefully remove the contents with a syringe or syringe. Rinse well and dry. Such "paints" will serve you for more than one year.
- Dilute the base dye in a deep bowl, add a couple of tablespoons of vinegar and color the eggs in a uniform color. Put them on a napkin or wire rack, leave to dry completely.
- In another, shallow bowl (so that the egg does not completely dip), dilute the dye of a darker tone or contrasting color. Pour in 1 tbsp. vegetable oil and stir it so that beautiful patterns form on the surface of the liquid. Dip the egg and roll around the circumference of the bowl. Oil with dye will settle on the shell, forming a fancy marble pattern. Blot with paper towel and let dry.

silk patterns
A very fun way to color Easter eggs, which allows you to get intricate and all kinds of patterns.
For the job you will need: assorted pieces of 100% silk (large enough to wrap an egg), rubber bands, raw white eggs, vinegar, an enamel or glass saucepan, paper towels, vegetable oil, an old cotton white sheet or tablecloth.
- Wrap the raw egg tightly with a silk flap (with the right side to the shell), secure the fabric with an elastic band. Wrap a piece of undyed cotton over the top.
- Place the eggs in an enamel or glass saucepan, cover completely with water and add 3 tbsp. vinegar. Bring water to a boil, continue to simmer for 40 minutes over low heat.
- Remove the eggs from the water, let them cool, then remove the material. To add shine, dip a paper towel in oil and wipe the shell.

Painting Easter eggs: wax, marker and paint
"Pysanky"
 The technique of Ukrainian pysanka is taken as a basis - drawing patterns from wax on hard-boiled eggs. Melted wax is applied to an egg, which is then dipped in dye. After dyeing, the wax melts, and bizarre patterns open up.
To create a more complex pattern, you can use wooden skewers, a pencil eraser or a pin. However, here you can not do without a certain skill. There is also a simple, no less interesting technique for which you will need: eggs, food coloring, wax, a container for melting wax, several bowls for different dyes, paper towels, a baking sheet.
- Dye the eggs in a light tone (later you can make the dye more concentrated for stripes of a saturated tone).
- Melt the wax in a water bath and dip both ends of the egg into it (the wax will prevent the covered area from turning into the next color).
Dip the eggs in the next dye for a minute, remove and let dry completely. Then again, only deeper, dip into wax, leaving a wide strip in the middle for coloring. Now dip into the third dye.
Place the fully colored Easter eggs on a baking sheet lined with waxed paper and place in the preheated oven for 5 minutes. When the wax is melted, remove it with a paper towel.
Watercolor and marker for coloring Easter eggs
If you have high-quality watercolor and watercolor pencils (they spread a little and form an interesting pattern when in contact with a wet surface), you can safely experiment and create original ornaments on the shell. If you want to save the eggs until the next Easter holiday, clean them of the contents and cover the drawing with a fixing protective spray varnish.


Even in the absence of watercolors, you can create creative Easter decorations using only a permanent marker.

Easter egg decoration: stencil, washi tape and decoupage
Funny ornaments from Japanese washi tape (Washi)
Scrapbookers are familiar with this decorative ribbon. A wide range of prints, sizes and shapes allows you to use Washi tape for any decor, including decorating Easter eggs. The material is very easy to use, you just need to carefully stick a strip of tape on the surface.

Create stencils from duct tape and double tape
To achieve a similar effect, adhesive stencils or strips of electrical tape are used.
- First, wrap an unpainted egg with a narrow strip of electrical tape or stick stencils. Dip into first color, then dry with paper towel.
- Remove the film. Apply a second layer of duct tape in the opposite direction and dip in the second dye. Dry. Remove the stencil strip from the finished egg.

And such wonderful Easter eggs are decorated with double stationery tape and multi-colored glitter.


